During this lab, you will become familiar with Microsoft®
Office 365™ by signing up for a new Office 365 trial account
and navigating the Office 365 admin portal. You will create new users using the
Office 365 admin center, create multiple user accounts using a CSV file, and
create a user using Windows PowerShell®. Additionally, you will
experience Office 365 as a pilot user by signing in to the Office 365 portal,
Microsoft Outlook® Web App, and using Microsoft OneDrive™
for Business.
Estimated time to complete: 75 minutes
Before You Begin
Before you can complete this lab, you must complete the
previous lab.
What You Will Learn
After completing the exercises, you will be able to:
· Sign
up for a new Office 365 trial tenant.
· Create
user accounts using different methods.
· Activate
an Office Pro Plus subscription.
· Navigate
Outlook Web App.
· Synchronize
documents using OneDrive for Business.
Scenario
You will be deploying Office 365 within your organization
and you must become familiar with the service. You want to create pilot user
accounts and become familiar with the Office 365 admin center. Your goal is to
experience Office 365 with the intent of moving your organization to
Office 365.
Exercise 0: Preparing the Lab Environment
In this exercise, you will prepare the lab environment by
connecting to the necessary virtual machines using the Windows Server®
2012 R2 Hyper-V® Manager.
Virtual Machines
The following virtual machines will be used during this
exercise:
· DC1
· MBX1
· MBX2
· SRV1
· SRV2
· CL1
· TMG1
Tasks
1.
Verify that the virtual machines are running.
The virtual machines from the previous lab should
still be running. Use the Hyper-V Manager window to verify that the virtual
machine statuses are running.
Exercise 1: Provisioning an Office 365
Enterprise Tenant
In this exercise, you will sign up for a new Office 365
trial account. Ultimately, you want to be able to move your organization to
Office 365.
Virtual Machines
The following virtual machine will be used during this
exercise:
· DC1
Tasks
1.
Sign up for a new Office 365 Enterprise tenant.
a.
Switch to DC1 signed in as Onprem\Administrator.
b.
Open Internet Explorer and browse to http://office.microsoft.com/en-us/business/office-365-enterprise-e3-business-software-FX103030346.aspx
c.
Under Office 365 Enterprise E3, click Free trial.
If you are presented with a chat window, click Not
now.
d.
On the Welcome page, complete the Country or region, First
name, Last name, Business email address, Business phone
number, and Company name boxes.
For this lab, it is recommended to set the trial
account’s Country or region field to United States. This will
ensure that all tasks in the labs can be completed successfully. After sign up
is complete, the country or region cannot be changed.
When you are finished, click Next.
e.
On the Create your user ID page, in the Enter a user name box,
type a name that you will use for your tenant administrator account. This is
the first account that will be created for managing your Office 365 tenant and
it will be assigned as a global administrator.
f.
In the Company name box, type a name that will be used by Office
365 to identify your tenant.
This is the name that will appear to the right of the @
symbol. This will become part of your sign in name as well as your email
address. It is possible that the Company name you choose is already in use by
another Office 365 tenant. If this occurs, choose another name for your
company. You will be notified of a company name conflict when you attempt to
create the password for the administrator account.
g.
In the Create password and Confirm password boxes, type a
password for your tenant administrator account, and then click Next.
2.
Complete tenant provisioning.
a.
On the Prove page, in the Phone number box, type a phone
number that you have access to that can receive text messages, and then click Text
me.
b.
In the Enter your verification code box, type the verification
code that has been sent to you, and then click Create my account.
c.
On the Save this info page, review the information, and then click You’re
ready to go.
d.
On the Office 365 page, in the top navigation, click Home.
e.
On the Office 365 admin center dashboard page, under Current health,
notice that Office 365 is completing the provisioning of your Office 365 online
services. Your services may be complete and ready immediately.
f.
Click your tenant administrator name or user icon, and then click Sign
out.
g.
Close Internet Explorer.
3.
Connect to the Microsoft Office 365 admin center.
a.
On DC1, open Internet Explorer and browse to http://portal.office.com
b.
On the Office 365 page, in the Sign in with your organizational
account box, type your tenant administrator user name and password, and
then click Sign in.
This is the user name and
password that you used to sign up for your Office 365 trial account.
c.
On the Office 365 page, in the top navigation, click Home.
4.
Explore the Office 365 admin center.
a.
On DC1, in the Office 365 admin center, in the feature pane, click DASHBOARD.
b.
In the top left corner, click the app launcher  icon.
icon.
The app launcher contains common
navigation elements used by all Office 365 users. Depending on your role in the
organization, more or fewer options are visible. When pointing to and resting
on icons in the app launcher, you’ll be presented with an ellipsis that will
allow you to unpin apps from the app launcher or pin or unpin apps from the
navigation bar.
Click Admin.
c.
On the dashboard, under Current health, ensure that there are no
services still listed as provisioning. If some services are still being
provisioned, wait for them to complete before continuing. You may need to
refresh the page to update the status.
d.
Click the app launcher, and then click Sites.
e.
You will be redirected to your personal site.
If you are presented with the
Welcome to OneDrive for Business page, click Next and complete the setup
wizard. When complete, click the app launcher and then click Sites.
If necessary, click Office 365 and then, from the app launcher, click Sites.
f.
The site may not be setup immediately, however, you will still be able
to accomplish certain tasks. Review the available information on the page.
When complete, click the app
launcher and then click Admin.
g.
On the dashboard page, scroll right and review the admin shortcuts,
resources, and community links available.
h.
In the feature pane, click SETUP. The feature pane is the left
navigation of the admin center.
Setup provides wizards for
quickly configuring your Office 365 tenant as well as extending your existing
setup.
i.
In the feature pane, click USERS, and then click Active Users.
In the Users area, you
manage active and deleted users, and delegated admins. Features on the ACTIVE
USERS tab include enhancement settings for your organization when single
sign-on and Active Directory® synchronization with your on-premises
organization are used.
j.
In the feature pane, click Delegated Admins. Delegated admins are
authorized Microsoft partners who you designate for administering your Office
365 organization.
k.
In the feature pane, click Deleted Users.
Review the description on the DELETED
USERS tab and notice that a deleted user account is recoverable for 30 days
after deletion.
l.
In the feature pane, click DOMAINS.
The domains feature displays the
domain name or names associated with your organization.
m.
In the feature pane, click BILLING, and then click Subscriptions.
On the SUBSCRIPTIONS tab,
you can view and manage your subscription and subscription details.
n.
In the feature pane click Licenses.
On the LICENSES tab, you
can view the license plans and the number of licenses in the plan that have
been assigned.
o.
In the feature pane, click SERVICE SETTINGS.
On the SERVICE SETTINGS
tab, review the different areas available for administrator management.
p.
Click Updates. Notice that administrators can enable the
organization to receive new Office 365 features as soon as they are made
available.
q.
In the feature pane, click REPORTS.
The reports feature provides
administrators a way of viewing organizational information for different
service offerings in their subscription. Review the list of available reports.
r.
In the feature pane, click SERVICE HEALTH, and then click Service
Health.
s.
The SERVICE HEALTH tab reports events that are currently
happening or have occurred within the past seven days.
t.
In the feature pane, click Planned Maintenance.
It is a good idea to consult the
planned maintenance schedule before performing large or long running
administrative tasks for your organization.
u.
In the feature pane, click SUPPORT, and then click Overview.
Support offers an administrator
a way to get answers to questions for situations that may be affecting an
organization’s users. Additionally, new service requests can be created and
viewed.
v.
In the feature pane, click PURCHASE SERVICES.
An administrator can use this
area to review and purchase existing and additional service offerings.
w.
Click the back arrow to return to the admin center.
x.
In the feature pane, click MESSAGE CENTER.
The message center displays key
information for an administrator that may require action. For example, end of
supported operating system or browser.
y.
In the feature pane, click TOOLS.
Review the available tools that
you can use to perform checks to help you evaluate and test your deployment of
Office 365.
z.
You may see additional features available in the Office 365 admin
center. The service is continually improving and adding new features to support
new technologies that become available to Office 365 subscribers. Review any
additional features not examined in the exercise. When complete, return to the
Office 365 admin center.
Exercise 2: Creating Office 365 Pilot Users and
Groups
In this exercise, you will use different methods for
creating new user account in Office 365.
Virtual Machines
The following virtual machine will be used during this
exercise:
· DC1
Tasks
5.
Create a new user using the Office 365 admin center.
a.
On DC1, in the Office 365 admin center, in the feature pane, click USERS,
and then click Active Users.
b.
On the ACTIVE USERS tab, in the menu, click Add.
This is the plus sign icon.
c.
In the Create new user account window, in the First name box,
type Norman.
d.
In the Last name box, type Eagle.
e.
In the User name field, type NormanE.
The Display name will
automatically be completed.
f.
Review the password options for the new user account. Click Type
password.
g.
In the Enter password and Re-enter password boxes, type TempPassword1
h.
Notice that the user will be required to change their password by
default, and that a license will automatically be assigned to the new user
account. Click Create.
i.
On the Create new user account page, review the message, and then click Close.
6.
Create new users using Bulk add.
a.
In the Office 365 admin center, on the ACTIVE USERS tab, on the
toolbar, click Bulk add  .
.
b.
On the select a csv file page, click Download a sample CSV file.
c.
In the notification banner, click Open.
d.
In the How do you want to open this type of file dialog box,
click Notepad.
e.
Review the format of the comma separated value sample document. The
sample file is an example of a correctly formatted CSV file. It is important
that you do not add or change any of the column headings or else Office 365
might not be able to create the users. The User Name and Display Name are the
only required fields.
f.
Close the sample CSV file.
g.
On the select a csv file page, click Download a blank CSV file.
h.
In the notification banner, click Open.
i.
Under the list of headings, type the following. Be sure to use your
tenant domain name.
BasilM@yourtenantdomainname,Basil,Maxwell,Basil
Maxwell
DarleneP@yourtenantdomainname,Darlene,Patton,Darlene
Patton
TeresaC@yourtenantdomainname,Teresa,Carpenter,Teresa
Carpenter
When complete, your text file
should look similar to this:
User Name,First Name,Last
Name,Display Name,Job Title,Department,Office…
BasilM@contoso.onmicrosoft.com,Basil,Maxwell,Basil
Maxwell
DarleneP@contoso.onmicrosoft.com,Darlene,Patton,Darlene
Patton
TeresaC@contoso.onmicrosoft.com,Teresa,Carpenter,Teresa
Carpenter
j.
On the menu, click File and then click Save As.
k.
In the Save As window, in the File name box, type C:\LabFiles\NewUsers.CSV
l.
Click the Save as type menu, click All Files, and then
click Save.
m.
Close Notepad.
n.
In the Office 365 admin center, on the select a csv file page, click Browse.
o.
Browse to C:\LabFiles, click NewUsers.CSV and then click Open.
p.
On the select a csv file page, click Next.
q.
On the verification results page, review the results, and then click Next.
If you have any errors, click Back,
open File Explorer, browse to C:\LabFiles, open the NewUsers.CSV file,
and then correct the CSV file. After it is corrected, upload the file again.
r.
On the settings page, verify that Allowed is selected.
s.
Under Set user location, click the Select a location menu,
click United States, and then click Next.
t.
On the assign licenses page, accept the default selection and then click
Next.
u.
On the send results in email page, click Create.
v.
On the results page, review the information, and then click Close.
w.
On the ACTIVE USERS tab, notice the new users that have
been created.
x.
Click the app launcher and then click Mail.
y.
On the Outlook Web App page, select your language and time zone, and
then click save.
z.
In the messages list, click the email from Microsoft Online Services
Team.
aa.
In the results pane, review the email that contains the new user account
information and temporary passwords. You may have to wait for the email with
information for the three new accounts to arrive. If, after 1-2 minutes the
email does not arrive, continue with the lab.
bb.
Click the app launcher and then click Admin.
7.
Create a new user using remote PowerShell.
In
order to manage users in Office 365, you must install the Windows Azure®
Active Directory Module for Windows PowerShell. The Windows Azure Active
Directory Module for Windows PowerShell requires the Microsoft Online Services
Sign-in Assistant version 7.0 or greater. It also requires .NET Framework 3.5
SP1 or greater. .NET Framework 3.5.1 has already been installed on DC1.
a.
On DC1, open File Explorer, and then browse to C:\LabFiles.
b.
In the files list, double-click msoidcli_64.msi.
c.
In the Microsoft Online Services Sign-in Assistant Setup page, select
the I accept the terms in the License Agreement and Privacy Statement
check box, and then click Install.
d.
On the Completed the Microsoft Online Services Sign-in Assistant Setup
Wizard page, click Finish.
e.
In File Explorer, double-click AdministrationConfig-EN.msi.
f.
On the Welcome page, click Next.
g.
On the License Terms page, click I accept the terms in the License
Terms and then click Next.
h.
On the Install Location page, accept the default installation location
and then click Next.
i.
On the Ready to Install page, click Install.
j.
On the Completing page, click Finish.
k.
Close File Explorer.
l.
On the taskbar, click Windows PowerShell.
Windows PowerShell version 3.0
and later will automatically load installed PowerShell modules on-demand.
m.
At the Windows PowerShell command prompt, type the following and then
press Enter:
Connect-MsolService
n.
In the Enter Credentials window, type your tenant administrator user
name and password, and then click OK.
o.
At the Windows PowerShell command prompt, type the following and then
press Enter:
Get-MsolUser
Notice the users you created
earlier and the license assignments.
p.
At the Windows PowerShell command prompt, type the following and then
press Enter:
Get-MsolAccountSku
Note the available license AccountSkuId
information for your account.
q.
At the Windows PowerShell command prompt, type the following and then
press Enter:
New-MsolUser -FirstName Ramona -LastName Holder -UserPrincipalName
RamonaH@yourtenantdomainname -DisplayName "Ramona Holder"
-LicenseAssignment youraccountSkuID -UsageLocation US
-Password TempPassword1
Review the output of the command
and the password created for the user. The temporary password will not be
emailed to an administrator account.
r.
Close Windows PowerShell.
s.
Switch to the Office 365 admin center.
t.
In the feature pane, expand USERS and the click Active Users.
u.
In the active users list, double-click Ramona Holder.
If necessary, refresh the web
page.
v.
In the left navigation, click Licenses and review the license
assignment.
w.
Review the other information available for the user account and then
click Cancel.
8.
Get started with Office 365 security groups.
A
security group in Microsoft Office 365 for enterprises is a group of Microsoft SharePoint®
Online users that is granted access to specific SharePoint Online resources by
an administrator. For example, an administrator can create a security group to
grant a certain group of people access to a SharePoint site.
a.
On DC1, in the Office 365 admin center, in the feature pane, click GROUPS.
b.
On the toolbar, click Add.
c.
In the Group Name box, type Site Admins and then click Create.
d.
On the Created security group page, click Edit members.
e.
On the Site Admins Security Group page, click ADD MEMBER.
f.
In the Add members to group Site Admins window, in the Search box,
type Basil Maxwell.
g.
In the resolved names list, click Basil Maxwell, and then click Add.
h.
In the Add members to the group Site Admins window, click Close.
i.
Click the app launcher and then click Sites.
j.
On the Sites page, click new.
If your site is still being
setup, you will need to wait until it is complete before continuing.
Periodically refresh the page until the site setup is complete. If the site has
still not been created within five minutes, continue to the next exercise and
return to this task at a later time.
k.
In the Start a new site dialog box, in the Give it a name
box, type Ignite and then click Create.
Wait for the new site to be
created. You will automatically be redirected to the site page when it is
complete.
l.
On the Ignite page, in the menu in the top right of the page, click SHARE.
m.
In the Share ‘Ignite’ window, click SHOW OPTIONS.
n.
Click the Select a group or permission level menu and then click Ignite
Owners [Full Control].
o.
In the Enter names, email addresses, or ‘Everyone’ box, type Site
Admins
p.
When the group name resolves, in the result list, click Site Admins
and then click Share.
If the group name is not found,
you may need to wait until the directory has been updated. Continue with the
lab and return later to add the group. This will not cause errors in later
labs.
q.
In the top navigation menu, click your tenant administrator user name or
user icon if the name of the administrator account is not visible, and then
click Sign Out.
r.
Close Internet Explorer.
Exercise 3: Signing In as a New Pilot User
In this exercise, you will sign in as a new Office 365 user
for the first time and update the user’s account password.
Virtual Machines
The following virtual machine will be used during this
exercise:
· DC1
Tasks
9.
Sign in to the Office 365 portal as a pilot user.
a.
On DC1, open Internet Explorer and browse to http://portal.office.com
b.
On the Office 365 page, in the Sign in with your organizational
account box, type RamonaH@yourtenantdomain.
c.
In the Password box, type TempPassword1 and then click Sign
in.
10. Update
the pilot user’s password.
a.
On the update password page, in the Old password box, type TempPassword1
b.
In the New and Confirm new password boxes, type pass@word1
and then click submit.
The online user accounts will be
using a different password than the on-premises user accounts for now. Later,
directory synchronization will synchronize both the on-premises and the cloud
user account’s passwords.
c.
Click the app launcher and review the available apps. Notice that
this user is not assigned to any administrator roles.
In the top navigation menu,
click Ramona Holder or the user account icon, and then click Sign out.
d.
Close Internet Explorer.
Exercise 4: Activating an Office 365 ProPlus
Subscription
In this exercise, you will activate an Office 2013 ProPlus
subscription using an Office 365 account that has be assigned an Office ProPlus
license.
Virtual Machines
The following virtual machine will be used during this
exercise:
· CL1
Tasks
11. Open
Microsoft Word and activate.
Office
365 ProPlus has already been installed on CL1.
a.
Switch to CL1.
b.
Click the lock screen or trigger Ctrl+Alt+Delete.
c.
On the sign in page, click the Switch user icon.
d.
Click Other user.
e.
In the User name box, type NormanE
f.
In the Password box, type Pa$$w0rd and then press Enter.
The user account was created by
the ConfigEnv.ps1 script from Lab 0. Currently, the user has both an
on-premises Active Directory account as well as an Office 365 user account.
g.
On the taskbar, click Internet Explorer and browse to http://portal.office.com
h.
On the Office 365 page, in the Sign in with your organizational
account box, type NormanE@yourtenantdomainname.
i.
In the Password box, type TempPassword1, and then click Sign
in.
j.
On the update password page, in the Old password box, type TempPassword1
k.
In the New and Confirm new password boxes, type pass@word1
and then click submit.
l.
Close Internet Explorer.
m.
Click Start and, on the Start screen, type Word. There is
no need to find a text box to type into when on the Start screen. Just start
typing and Windows® 8 will begin searching automatically for
matching applications, settings, and files as you type.
n.
Click Word 2013.
o.
In the Activate Office window, in the Type your email address box,
type NormanE@yourtenantdomainname and then click Next.
p.
In the Sign In window, in the Password box, type pass@word1
and then click Sign in.
q.
In the Account Updated dialog box, click OK.
If you receive an error message
stating that the account is not associated with this Office product, you will
need to wait until the license has been replicated in the Office 365 service.
You may want to continue to the next exercise and return to complete the
remaining tasks in this exercise if, after 3-5 minutes and retrying, you
receive the same error message.
r.
In the First things first window, click No thanks and then click Accept.
s.
Close the Welcome to your new Office window.
t.
Close Word.
12. Open
Microsoft Excel® and verify Office 365 ProPlus activation.
a.
Click Start and the, on the Start screen, type Excel.
b.
Click Excel 2013.
c.
Click the Blank workbook template.
d.
In the top right, click Norman Eagle and then click Account
settings.
e.
On the Account page, review the information about this subscription
product.
Under Connected Services, if you
see a message that reads Can’t display online services, click Try
again.
13. Connect
to Office 365 and review license usage.
a.
On the Account page, under Product Information, click Manage
Account.
b.
On the Office 365 page, in the Sign in with your organizational
account box, type NormanE@yourtenantdomainname.
c.
In the Password box, type pass@word1 and then click Sign
in.
d.
On the Office page, review the information for Office installations that
have been updated in Office 365.
Notice the number of remaining
installs available.
e.
Switch to Excel and close Excel.
Exercise 5: Using Self-Service in Office 365
In this exercise, you will experience some of the
self-service options available to Office 365 users.
Virtual Machines
The following virtual machine will be used during this
exercise:
· CL1
Tasks
14. Use
connected accounts in Outlook Web App.
a.
On CL1 signed in as Norman Eagle, switch to Internet Explorer.
i.
If Internet Explorer is not open and signed in to Office 365, open Internet
Explorer and browse to http://portal.office.com
ii.
On the Office 365 page, in the Sign in with your organizational
account box, type NormanE@yourtenantdomainname.
iii.
In the Password box, type pass@word1, and then click Sign
in.
b.
Press Alt and then, in Internet Explorer, click Tools, point to Pop-up
Blocker, and then click Turn off Pop-up Blocker.
c.
In the Pop-up Blocker dialog box, click Yes.
d.
On the Office 365 page, click the app launcher, and then click Mail.
e.
On the Outlook Web App page, select the appropriate language and time
zone, and then click save.
f.
In the Outlook top navigation menu, click Settings and then click Options.
g.
In the feature pane, under Accounts, click the Connected
accounts.
h.
On the menu, click the New icon.
i.
On the New account connection page, in the Email address box,
type NormanE@yourlabdomainname. This is the on-premises domain
name.
For example,
NormanE@Lab01234.O365Ready.com.
j.
In the Password box, type Pa$$w0rd and then click OK.
k.
On the New account connection page, click OK.
l.
On the Connected accounts page, in the Status column, review the current
status.
m.
In the top navigation, click Mail.
Notice the emails that have been
retrieved from the connected account.
You may need to wait for the
messages to arrive. It may also be necessary to refresh the browser.
15. Create
and add members to a distribution group.
a.
On CL1 in Outlook Web App, in the top navigation menu, click Settings and then click Options.
b.
In the feature pane, click OTHER, and then click Go to the
earlier version.
c.
In the feature pane, click groups.
d.
In the results pane, under distribution groups I own, click the New
icon.
e.
On the new distribution group page, in the Display name box, type
Project X.
f.
In the Email address box, type ProjectX.
g.
Scroll down to Members and click Add.
If necessary, in the Internet
Explorer dialog box, click Yes.
h.
In the DIRECTORY list, click Add next to Basil Maxwell
and Darlene Patton, and then click OK.
If the directory list is not
available or the page does not load, close the Internet Explorer windows and
continue to the next exercise. It may be that the group is still being
provisioned in Azure Active Directory.
i.
Scroll down and under Choose whether owner approval is required to
join the group, click Owner approval, and then click save.
j.
Click the app launcher and then click People.
k.
In the folder list expand Directory, and then click All
Distribution Lists.
Notice that the new group the
user created now shows in the directory and is available for the organization
to send messages to. An administrator can manage a user’s ability to create
groups as well as the naming of groups.
l.
In the top navigation menu, click Norman Eagle or click the user
icon, and then click Sign out.
m.
Close Internet Explorer.
Exercise 6: Navigating Outlook Web App as a
Pilot User
In this exercise, you will become familiar with some of the
features in Outlook Web App for Office 365 users.
Virtual Machines
The following virtual machine will be used during this
exercise:
· CL1
Tasks
16. Sign
in to Outlook Web App as a pilot user.
a.
On CL1 signed in as Norman Eagle, on the taskbar, click Internet
Explorer and browse to http://outlook.office365.com
b.
On the Office 365 page, in the Sign in with your organizational
account box, type NormanE@yourtenantdomainname. Norman
Eagle's account may be listed on the page, if so, you can click NormanE@yourtenantdomainname.
c.
In the Password box, type pass@word1 and then click Sign
in.
17. Review
the Inbox.
a.
In Outlook Web App, in the message list, click one of the messages from
Holly Holt.
b.
In the reading pane, notice the user photo icon.
The sender photo displays in
messages when a photo is available in the directory or contacts.
c.
In the reading pane, click the ellipsis  next to
FORWARD.
next to
FORWARD.
d.
Click View message details.
e.
Review the message details information and then click Close.
f.
In the message list, click the message from Holly Holt that has an
attachment.
g.
In the reading pane, click REPLY.
h.
In the From box, notice that the message will automatically be
sent from NormanE@yourlabdomainname. This is the connected account from
your on-premises organization and not from the tenant domain account.
i.
Click From and see that you can change the sender between the
connected account and tenant account. Click the on-premises email address.
j.
In the message body, type Thanks Holly and then, in the message
list, click the message from Basil Maxwell.
k.
In the message list, click the message listed as Draft.
l.
In the reading pane, click CONTINUE EDITING.
m.
In the reading pane, click SEND.
n.
In the message list, expand the Proposal doc conversation.
Notice that conversation view
shows the folder where each email in the conversation is located.
o.
In the message list, click the message from Basil Maxwell, right-click
the Flag icon, and then click This week.
p.
Above the message list, click each of the available email filters.

Notice the flagged message is
available in the Flagged filter view.
q.
Click the All filter.
18. Create
a new email message.
a. In
Outlook Web App, click New.
Notice that the new message is
created in the reading pane.
b.
In the new message, click Open in a separate window, as shown in the
following image.

c.
In the menu bar, click the ellipsis next to APPS.
d.
Review the available message settings. Point to Set importance
and then click Low.
e.
In the To box, type Ramona, and then click Search
contacts and directory.
f.
Right-click Ramona Holder and then click View details.
g.
In the top right of the contact card, click Add to contacts, and
then click Add to contacts.
h.
In the new contact card, click SAVE.
i.
In the email, click the Subject box and type Documents and
information for our meeting
j.
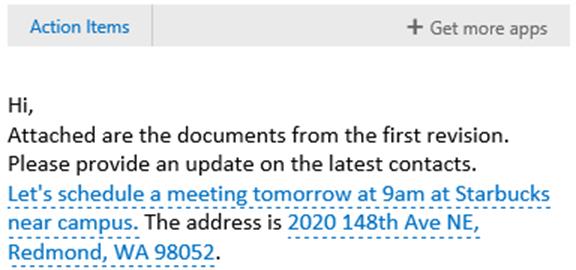
In the message body, type the following text. The text will evoke
specific actions and new features in Exchange Online. Type the following text
without any omissions to ensure that the demonstration works properly.
Hi,
Attached are the documents from the
first revision. Please provide an update on the latest contacts.
Let's schedule a meeting tomorrow
at 9am at Starbucks near campus. The address is 2020 148th Ave NE,
Redmond, WA 98052.
See you in the morning.
k.
Select the See you in the morning text and then, using the
toolbar, change the format and color of the text.
l.
Click the More  menu and review the
available options.
menu and review the
available options.
m.
Click SEND.
Review the attachment reminder.
Based on the message text, Exchange Online has determined that an attachment
may have been intended although no attachment was inserted.
n.
Click Don’t send.
o.
Click INSERT and then click Attachments or OneDrive files.
p.
In the left navigation, click Computer.
q.
In the Choose File to Upload window, browse to C:\LabFiles.
r.
Click Tailspin Budget.xlsx, press Ctrl, and then click Tailspin
Toys Outline.pptx and Tailspin Toys Proposal.docx.
Press the Ctrl key while
selecting files, to select and attach multiple items to the new mail.
s.
Click Open.
t.
On the Upload and share with OneDrive or send as attachment page, click Upload
and share with OneDrive.
Notice the icon for the
documents attached to the email have a cloud symbol indicating that they are
links to OneDrive documents.
u.
In the new email, click INSERT, and then click Pictures inline.
v.
In the C:\LabFiles directory, click Tailspin CEO.jpg and
then click Open.
Notice the
picture is created within the message body.
w.
Click the picture in the message body.
Notice that you can select to
resize or remove the image using the menu options.
x.
Click SEND.
y.
In the top navigation menu, click Norman Eagle or the user icon,
and then click Sign out.
19. Review the sent message.
a.
On the Office 365 page, in the Sign in with your organizational
account box, type RamonaH@yourtenantdomainname.
b. In
the Password box, type pass@word1 and then click Sign in.
c.
On the Outlook Web App page, select the appropriate language and time
zone and then click save.
d.
In the message list, click the message from Norman Eagle.
e.
In the reading pane, review the message.
You may have to wait for the
message to be delivered.
f.
Notice the presentation of the attached documents. Click Show all 3
attachments.
g.
Click the Tailspin Toys Proposal Word document.
Review the document opened in
Word Online. If the document is not able to be displayed, return to the message
in Outlook Web App, click the More actions  icon in the
attachment, and then click Download. This will open the document in Word
Online.
icon in the
attachment, and then click Download. This will open the document in Word
Online.
h.
Click BACK to return to Outlook.
i.
In the reading pane, notice that the installed Outlook Apps detected
items in the email.
j.
Some Outlook App links will
appear in the banner while others will be shown as links in the message body
itself.
Outlook Apps attempts to
anticipate your needs and will automatically use the contents of the email
message to propose actions you might want to take. For example, if an email
message contains a street address, the Bing Maps app offers you a Bing tab with
a quick link to a map and directions. Or, if a phrase in the email message
suggests a possible action item, the Action Items app creates a suggested Task
for your review. An offer to meet is suggested as an Appointment to be added to
your calendar, thanks to the Suggested Appointments app.
k.
Click Action Items.
Scroll down and notice the
message body text that is highlighted (you may need to scroll down the
message). This is the text that indicated a possible action item and it should
match the text in the action item frame.
l.
Click Action Items to close the view.
m.
In the message body, click the Let’s schedule a meeting link.
n.
In the Suggested Meetings frame, review the content, and then click SCHEDULE
EVENT icon.
Review the calendar appointment.
The time and date referenced in the body of the message are automatically set
in the appointment.
o.
Click DISCARD to discard the event.
p.
In the reading pane, click the address link in the message body.
Review the displayed interactive
map with the location marked. This is the location for the address found in the
body of the message. If the map does not load, click the address link again.
q.
In the map, click the Zoom in, Zoom out, and pan controls
to interact with the map. You can also click the map and move it using your
mouse.
r.
In the top navigation menu, click Ramona Holder or the user icon,
and then click Sign out.
s.
Close Internet Explorer.
20. Use
search in the Inbox.
a.
On CL1, on the taskbar, click Internet Explorer and browse to http://outlook.office365.com
b.
On the Office 365 page, in the Sign in with your organizational
account box, type NormanE@yourtenantdomainname.
c. In
the Password box, type pass@word1 and then click Sign in.
d. Above
the message list, click Search mail and people.
e.
In the Search mail and people box, type Tailspin
f.
Notice that results can be filtered right away for Keyword or From.
Click Keyword.
g.
Review the search results, click the result items, and review the hit
highlight text. Notice the counter at the bottom of the reading pane that shows
the number of hits found in that particular email.
h.
In the Search mail and people box, click the X to clear
the search.
i.
In the Search mail and people box, type Tail and notice
the search history.
j.
Finish the search by typing Tailspin Toys and then press Enter.
In the folder pane, review the
search refiners that are availble to help narrow the search results.
k.
Click the X to clear the search.
21. Work
with calendars in Outlook Web App.
a. Click
the app launcher and then click Calendar.
b.
In the folder pane, right-click My Calendars, and then click New
calendar. Alternatively, you can click the Add icon to the right of My
calendars.
c.
In the calendar name box, type Personal and then press Enter.
d.
In the folder pane, click Personal.
Calendar
items are color coded to their associated calendar.
e.
In the menu bar, click Day to change the calendar to day view.
f.
Under the view filters, click SPLIT to view the calendars
side-by-side.
g.
In the menu bar, click Week.
Notice that the calendars are
now overlaid and the split view is no longer available.
h.
In the folder pane, click the Personal calendar to remove it from
the view.
i.
In the menu bar, click Month.
In the month view, the agenda
view is available in the right pane. The agenda view provides information about
a selected day’s appointments.
j.
In the upper left, click New.
k.
In the Event box, type Weekly status meeting.
l.
Under Start, click the date menu and then, in the calendar, click
Tuesday in the week following the current date.
m.
Click the time menu.
n.
Scroll up or down and then click 2:00 PM.
o.
In the menu bar, click SCHEDULING ASSISTANT.
p.
In the add attendees box, type DarleneP and then press
Tab.
Notice the side-by-side
calendar that appears.
q.
In the upper right, click Week.
The calendar overlay
provides a view of free, busy, and tentative times making it easier to select a
block of time that best fits the appointment.
r.
In the calendar, click the Thursday 11:00 AM date/time.
s.
Click OK.
t.
In the meeting options, click the Repeat menu, and then click Every
Thursday.
u.
In the Location box, type Microsoft Building 33 and then
click Search Bing.
v.
Under Locations, click the identified location and then click OK.
w.
Click SEND.
22. Use
the People hub and linked contacts.
a. Click
the app launcher and then click People.
b.
In the My Contacts list, click Ramona Holder.
Review the information for
Ramona’s contact card that was added earlier. This contact information was
populated from the user’s Azure Active Directory attributes.
c.
Under Profile, click the SharePoint link.
d.
In the new Internet Explorer window, you will see Ramona Holder’s
personal SharePoint site.
Close the Ramona Holder Internet
Explorer tab.
e.
Under Linked contacts, click Manage. Because there is
enough information to match the Outlook contact and the Directory contact, both
contacts were linked automatically and display as a single contact card. Notice
that the linked contacts are identified as Outlook -(Contacts) and Directory.
f.
Click OK.
g.
In the contact card, click the Edit.
h.
Click the Add Email icon.
i.
In the Email 2 box, type RamonaH@Fabrikam.com
j.
Click in the Display as box and review the automatically added
text.
k.
Click SAVE.
l.
In the left navigation, expand My Contacts and then click Contacts.
m.
In the Ramona Holder contact card, click Send mail  .
.
Because Ramona’s contact card
contains different email addresses, all email addresses are available for
selection.
If a new email window opens,
close the window, refresh the browser, and then click Send mail again.
n.
Click the app launcher and then click Mail.
Exercise 7: Sharing and Synchronizing Documents
Using OneDrive for Business
In this exercise, you will use the OneDrive for Business
application and SharePoint site to synchronize and share documents between
Office 365 users.
Virtual Machines
The following virtual machine will be used during this
exercise:
· CL1
Tasks
23. Connect
to OneDrive for Business in Office 365.
a.
If you have not activated Office ProPlus, return to the activation task
earlier in this lab and complete it before continuing.
On CL1 signed in as Norman
Eagle, click Start.
b.
On the Start screen, type OneDrive
c.
In the results list, click OneDrive for Business 2013.
d.
In the Microsoft OneDrive for Business window, review the information
and default settings. Click Sync Now.
24. Review
the default share and share a document.
a.
In the Microsoft OneDrive for Business window, click Show my files.
b.
In the folder list, notice the new OneDrive - yourtenantdomainname
folder and the available folders.
Notice the Email attachments
folder created earlier when you shared documents using Outlook Web App and
OneDrive for Business.
c.
In File Explorer browse to C:\LabFiles.
d.
In the files list, right-click Acquisition Strategy.docx and then
click Copy.
e.
In the folder list, click OneDrive - yourtenantdomainname.
f.
Open the Shared with Everyone folder.
g.
Right-click in the empty folder and click Paste.
h.
Switch to Outlook Web App signed in as Norman Eagle.
i.
Click the apps launcher and then click OneDrive.
If necessary, on the Get started
with OneDrive for Business page, click Next.
j.
In the Get the most out of SharePoint window, window, click No Thanks.
k.
In the document library, click the Shared with Everyone folder.
l.
Notice the synchronized document.
m.
In the left navigation, click Documents.
n.
In the Documents library, click new and then click Word
document.
o.
In Word Online, in the title, click Document, and then type Project
X
p.
In the document, type Project X Starts Here
q.
In the top navigation, click Share.
r.
In the Share ‘Project X window, in the Enter names, email addresses,
or ‘Everyone’ box, type Ramona.
s.
In the result list, click Ramona Holder.
t.
Click SHOW OPTIONS.
u.
Verify that Send an email invitation is selected, click Share.
v.
In the top navigation menu, click Norman Eagle.
w.
In the Documents library, in the ribbon bar, click sync.
x.
In the Internet Explorer dialog box, click Sync now.
y.
Read the Microsoft OneDrive for Business dialog box and then
close the dialog box.
z.
In the top navigation menu, click Norman Eagle or the user icon,
and then click Sign Out.
aa.
Close Internet Explorer.
bb.
Open Internet Explorer and browse to http://outlook.Office365.com
cc.
On the Office 365 page, in the Sign in with your organizational
account box, type RamonaH@yourtenantdomainname.
dd.
In the Password box, type pass@word1 and then click Sign
in.
ee.
In the message list, click the message from Norman Eagle that refers to
the shared document.
ff.
In the reading pane, click the ProjectX.docx link.
gg.
Review the document in Word Online and then close the tab.
hh.
In Outlook Web App, in the reading pane, click the Follow link.
ii.
In the Follow ‘ProjectX.docx’ window, click Follow.
If you receive a Wait a
minute dialog box, read the information, and then click cancel.
jj.
In the Documents list, review the Sharing column and
notice the document that is shared with Ramona Holder.
kk.
In the document library, click the Shared with Everyone folder.
ll.
Notice the document that Norman shared with everyone.
mm.
In the top navigation menu, click Ramona Holder or the user
account icon, and then click Sign out.
nn.
Close Internet Explorer and all open tabs.
oo.
Switch to File Explorer.
pp.
In the folder list, click OneDrive - yourtenantdomainname
and notice the new ProjectX.docx that you created online.
qq.
Close File Explorer.

Lab 02: Deploying Office 365
Lab: Deploying Office 365
During this lab, you will add your on-premises domain to
your Microsoft® Office 365™ account. You will then verify
directory synchronization, and install and configure Microsoft Azure Active
Directory Sync Services to establish a same sign-on experience for your
on-premises users.
Estimated time to complete: 75 minutes
Before You Begin
Before you can complete this lab, all previous labs must be
complete.
What You Will Learn
After completing the exercises, you will be able to:
· Add
a custom domain to Office 365.
· Verify
your on-premises user account using the IdFix tool.
· Install
and configure Microsoft Azure Active Directory Sync Services.
· Understand
the available administrator roles Office 365.
Scenario
Now that you have your Office 365 organization configured,
you want to begin synchronizing your on-premises user accounts with your Office
365 account. You must first add your on-premises domain name as a managed
domain in Office 365. You can then verify your on-premises user accounts are
free from formatting errors that may prevent them from being synchronized with
Office 365. Finally, you will synchronize the on-premises user accounts with
Office 365 and establish a same sign-on experience.
Exercise 0: Preparing the Lab Environment
In this exercise, you will prepare the lab environment by
connecting to the necessary virtual machines using the Windows Server®
2012 R2 Hyper-V® Manager.
Virtual Machines
The following virtual machines will be used during this
exercise:
· DC1
· MBX1
· MBX2
· SRV1
· SRV2
· CL1
· TMG1
Tasks
2.
Verify that the virtual machines are running.
The virtual machines from the previous lab should
still be running. Use the Hyper-V Manager window to verify that the virtual
machine statuses are running.
Exercise 1: Adding Your Domain to Office 365
In this exercise, you will add your on-premises domain to
your Office 365 organization, and then update the Office 365 user accounts with
the new domain name.
Virtual Machines
The following virtual machine will be used during this
exercise:
· TMG1
Tasks
25. Add
a domain in Office 365.
a.
Switch to TMG1 signed in as Admin.
b.
Open Internet Explorer and
browse to http://portal.office.com
c.
On the Office 365 page, in the Sign in with your
organizational account box, type your tenant administrator user name.
d.
In the Password box, type
your tenant administrator password and then click Sign in.
e.
In the top navigation menu, click Home.
f.
In the feature pane, click DOMAINS.
g.
On the Manage domains page, click Add
domain.
h.
On the Add a new domain in Office
365 page, scroll down, and then click Let’s get started.
i.
In the Which domain do you want to use
box, type your lab domain name and then click Next.
For
example, LabXXXXX.O365Ready.com where XXXXX is your lab number.
j.
On the Add this TXT record page, in the TXT records table, write
down the information contained in the TXT value column.
This
will be similar to MS=ms54802849.
26. Create
the verification DNS record.
a.
On TMG1, switch to the DNS manager or, if not already opened, open DNS
Manager.
b.
In the console tree, expand TMG1, expand Forward Lookup Zones,
and then click your lab domain name DNS zone.
c.
Right-click your lab domain name DNS zone and then click Other New
Records.
d.
In the Resource Record Type window, in the Select a resource record
type list, scroll down, click Text (TXT), and then click Create
Record.
e.
In the New Resource Record window, in the Text box, type the text
record data you wrote down earlier, and then click OK.
Do not type any information in
the Record name box.
f.
In the Resource Record Type window, click Done.
27. Verify
the domain.
a.
On TMG1, switch to Internet Explorer.
b.
On the Add this TXT record page, scroll down, and then click Okay,
I’ve added the record.
c.
On the We've verified page, click Next.
d.
In the upper right corner click the Cancel new domain setup  icon.
icon.
You will not need to add users
or configure additional settings at this time.
e.
On the Manage domains page, notice that the lab domain name is listed as
Setup in progress. This is expected.
f.
Click the option button to the left of your lab domain name and then, in
the details pane, click Manage DNS.
g.
Under DNS management, notice that the domain’s DNS is listed as managed
outside Office 365.
h.
Click the back arrow.
28. Update
user accounts to use the new domain for sign in and email.
a.
On TMG1, in the Office 365 admin center, in the feature pane, expand USERS,
and then click Active Users.
b.
In the ACTIVE USERS list, select the check boxes next to Basil
Maxwell, Darlene Patton, Norman Eagle, Ramona Holder,
and Teresa Carpenter.
c.
In the details pane, click EDIT.
d.
On the details page, click the Domain menu and then click your
on-premises lab domain name.
e.
Scroll to the bottom of the page and then click Next.
Be sure that you do not change
the value of the domain when you scroll to the bottom of the page.
f.
On the settings page, click Next.
g.
On the assign licenses page, click Submit.
h.
Review the results page, verify the domain in the user name is correct,
and then click Finish.
If the information is not
correct, perform the steps again and assign the correct domain.
i.
Review the list of active users and notice that the USER NAME column has
been updated to include your on-premises lab domain name.
j.
In the feature pane, scroll down, and then, under ADMIN, click Exchange.
k.
On the dashboard page, under recipients, click mailboxes.
l.
In the mailboxes list, notice that the users now have the
on-premises lab domain name assigned as their email address. The administrator
account’s email address will not be changed in this lab. If the email address
has not been updated, on the toolbar, click Refresh. Periodically click
Refresh until the email addresses have been updated.
m.
Double-click Basil Maxwell.
n.
In the left navigation, click email address.
Notice that the account contains
the on-premises lab domain as the primary email address and tenant domain name
as a secondary email address. You may need to close the window and wait for a
minute if the email address has not updated.
o.
Click cancel.
p.
If opened in a new tab, in Internet Explorer, close the mailboxes -
Microsoft Exchange tab. Otherwise, in the top navigation menu, click the app
launcher, and then click Admin.
29. Activate
Directory synchronization.
a.
In the Office 365 admin center, in the feature pane, expand USERS,
and then click Active Users.
b.
Above the ACTIVE USERS list, locate Active Directory
synchronization.
c.
Next to Active Directory synchronization, click Set up.
d.
On the Set up and manage Active Directory synchronization page, under step
3, click Activate.
e.
In the Do you want to activate Active Directory synchronization
dialog box, click Activate.
f.
Click the back arrow.
g.
Above the ACTIVE USERS list, next to Active Directory
synchronization, notice that the Deactivate and Manage options
are now available.
h.
In the top navigation menu, click your tenant administrator name or user
icon and then click Sign out.
i.
Close Internet Explorer.
Exercise 2: Installing and Running the IdFix
DirSync Error Remediation Tool
In this exercise, you will download and install the IdFix
DirSync Error Remediation tool, run the tool and filter query location, and
then perform identity remediation.
Virtual Machines
The following virtual machines will be used during this
exercise:
· DC1
· MBX1
Tasks
30. Download
and install the IdFix DirSync Error Remediation tool.
a.
Switch to DC1 signed in as Onprem\Administrator.
b.
Open Internet Explorer and browse to http://download.microsoft.com
c.
In the Download Center, in the search box, type IdFix and
then press Enter.
d.
In the result list, click IdFix DirSync Error Remediation Tool.
e.
On the IdFix DirSync Error Remediation Tool page, click Download.
f.
In the Internet Explorer banner, click Save.
g.
In the Internet Explorer banner, click Open folder.
h.
In the Downloads folder, double-click IdFix.exe.
i.
Review the information for the self-extracting file and then click Unzip.
j.
In the WinZip Self-Extractor dialog box, click OK.
k.
In the WinZip Self-Extractor - IdFix.exe window, click Close.
31. Run
the IdFix tool and filter query location.
a.
In File Explorer, browse to C:\Deployment Tools\IdFix.
b.
Double-click IdFix.exe.
c.
In the IdFix Privacy Statement dialog box, click OK.
d.
In the IdFix version X - Multi-Tenant window, where X represents the
current version of the tool, on the menu, click the Filter  icon.
icon.
e.
In the Filter the Query window, in the Enter the subtree to search
box, type OU=Online,DC=Onprem,DC=local and then click OK.
f.
On the menu, click Query.
32. Perform
identity remediation.
IdFix
will perform a best effort to provide solutions to an identified error.
a.
In the results of the query, notice that Teresa Carpenter’s account
contains an invalid character as indicated in the ERROR column.
Review the VALUE and UPDATE
columns. The UPDATE column provides a suggested solution to correct the error.
b.
In the ACTION column, click the menu and then click EDIT. This
will update the account with the value shown in the UPDATE column.
c.
In the menu, click Apply.
d.
In the Apply Pending dialog box, click Yes.
e.
Notice that the ACTION column has updated to read COMPLETE.
f.
In the menu, click Query.
g.
In the bottom left, review the Query and Error count information.
h.
Close IdFix.
i.
Close File Explorer.
j.
Close Internet Explorer.
k.
Switch to MBX1 and open the Exchange Management Shell.
l.
In the Exchange Management Shell, type the following and then press
Enter:
Get-Mailbox -Identity TeresaC | FL *email*
Notice that the update to
Teresa’s email address has not occurred yet since the correction to her
account’s Alias.
m.
In the Exchange Management Shell, type the following and then press
Enter:
Get-EmailAddressPolicy | Update-EmailAddressPolicy
Updating the email address
policy will immediately apply the correct primary SMTP address to Teresa’s
account.
n.
In the Exchange Management Shell, type the following and then press
Enter:
Get-Mailbox -Identity TeresaC | FL *email*
Review the output of the command
and verify that Teresa’s primary SMTP address and Windows email address do not
contain an apostrophe. Her secondary SMTP address will still exist with the
apostrophe.
Exercise 3: Using the Microsoft Azure Active
Directory Sync Services Tool
In this exercise, you will install and run the Microsoft
Azure Active Directory Synchronization tool, and then synchronize a specific
organizational unit with your Office 365 organization.
Virtual Machines
The following virtual machines will be used during this
exercise:
· SRV1
· CL1
Tasks
33. Install
and configure the Microsoft Azure Active Directory Synchronization (AADSync) tool.
a.
Switch to SRV1 signed in as
Onprem\Administrator.
b.
Open Internet Explorer and
browse to http://portal.office.com
c.
On the Office 365 page, in the Sign in with your
organizational account box, type your tenant administrator user name.
d.
In the Password box, type your tenant
administrator password and then click Sign in.
e.
In the top navigation, click Home.
f.
In the feature pane, expand USERS, and then
click Active Users.
In the ACTIVE
USERS list, review the STATUS column. The creation and management of these
accounts is performed in Office 365. When directory synchronization is
complete, this information will update to reflect the synchronization with
Active Directory.
g.
In Internet Explorer, press Ctrl + T to open a new tab, and then browse
to http://download.microsoft.com
h.
In the Download Center, in the search box, type Azure AD sync
and then press Enter.
i.
In the result list, click Microsoft Azure Active Directory
Sync Services.
j.
On the Microsoft Azure Active Directory Sync Services page, click Download.
k.
In the Internet Explorer banner, click Run.
Wait for the installation to
start.
l.
In the Microsoft Azure Active Directory Sync Services window, on the
Welcome to Azure AD Sync page, review the default installation path, select the
I agree to the license terms check box, and then click Install.
m.
On the Connect to Azure AD page, in the Username box, type your
Office 365 tenant administrator user name.
n.
In the Password box, type your tenant administrator password and
then click Next.
o.
On the Connect to AD DS page, in the Forest box, type Onprem.local
p.
In the Username box type Onprem\Administrator
q.
In the Password box, type Pa$$w0rd, click Add Forest,
and then click Next.
r.
On the Uniquely identifying your users page, review the default
settings, and then click Next.
s.
On the Optional features page, select the Password synchronization
check box, and then click Next.
The Password write-back feature
will not be used in the labs. It is a feature available in Microsoft Azure
Active Directory Premium.
t.
On the Ready to configure page, click Configure.
u.
On the Finished page, clear the Synchronize now check box, review
the information, and then click Finish.
When Synchronize now is selected
the Azure AD Sync Scheduler task in Task Scheduler is enable and will
synchronize the directory automatically every three hours. The Azure AD Sync
Scheduler task will be enabled in a later lab.
v.
Point to the lower left corner and then click Start.
w.
On the Start screen, click Administrator and then click Sign
out.
To start the AADSync tool
synchronization manager successfully, users who log on to the computer on which
the AADSync is installed must be members of the local ADSyncAdmins group that
was added during the installation of the tool.
You will sign out now and sign
in later in order to establish the new group membership in the access token.
34. Configure
organizational unit based filtering.
a.
On SRV1, in the Virtual Machine Connection window toolbar, click the Ctrl+Alt+Del
icon. Or, in the hosted virtual machine console, send Ctrl+Alt+Del to the
virtual machine.
b.
On SRV1, click Administrator.
c.
In the Password box, type Pa$$w0rd and then press Enter.
d.
On the desktop, point to the lower left corner and then click Start.
e.
On the Start screen, click Synchronization Service.
f.
In the Synchronization Service Manager window, on the toolbar, click Connectors.
g.
In the Connectors list, double-click Onprem.local. This is
the Active Directory Domain Services connector.
h.
In the Properties window, in the Connector Designer pane, click Configure
Directory Partitions.
i.
In the results pane, click Containers.
j.
In the Credentials window, in the Password box, type Pa$$w0rd
and then click OK.
k.
In the Select Containers window, clear the DC=Onprem,DC=local
check box to remove all of the selected organizational units.
l.
Select the Online check box and then click OK.
m.
In the Properties window, click OK.
Leave the Synchronization
Service Manager window open.
35. Run
directory synchronization.
a.
On SRV1, open Windows PowerShell.
b.
At the Windows PowerShell command prompt, type the following and then
press Enter:
CD "C:\Program
Files\Microsoft Azure AD Sync\Bin"
c.
At the Windows PowerShell command prompt, type the following and then
press Enter:
.\DirectorySyncClientCmd.exe
initial
Review the output for the
command.
d.
Switch to the Synchronization Service Manager.
e.
On the toolbar, click Operations.
f.
Under the Profile Name column, notice the synchronization
profiles that are running or have completed for the initial synchronization.
36. Review synchronized accounts in the Office 365
admin center.
a.
On SRV1, open Internet Explorer
and browse to http://portal.office.com
b.
On the Office 365 page, in the Sign in with your organizational
account box, type your tenant administrator user name.
c.
In the Password box, type your tenant
administrator password and then click Sign in.
d.
On the Office 365 page, in the top navigation, Home.
e.
In the feature pane, expand USERS, and then
click Active Users.
f.
In the ACTIVE USERS list, review the list of synchronized users.
Notice the STATUS column now
shows the synchronized users as Synced with Active Directory.
g.
In the list of users, click Norman Eagle, and then, in the
details pane, click EDIT.
Notice the banner indicating
that some of the user’s details can only be edited using the local Active
Directory.
h.
Click Cancel.
37. Sign
in to Office 365 using synchronized credentials.
a.
Switch to CL1 signed in as Norman Eagle.
b.
On the taskbar, click Internet Explorer.
c.
In Internet Explorer, in the
address bar, type http://portal.office.com and then press Enter.
If necessary, on the Office 365
page, click Use another account.
d.
In the Sign in with your organizational account box, type NormanE@LabXXXXX.O365Ready.com
where XXXXX is your lab number.
e.
In the Password box, type Pa$$w0rd
and then click Sign in.
Notice
that you are now signed in using the same password for on-premises and Office
365 because password synchronization is enabled as part of directory synchronization.
f.
In the top navigation menu, click Norman Eagle or the user icon,
and then click Sign out.
g.
On the Office 365 page, if necessary, click Use another
account.
h.
In the Sign in with your organizational account box, type DarleneP@LabXXXXX.O365Ready.com
where XXXXX is your lab number.
i.
In the Password box, type Pa$$w0rd
and then click Sign in.
This
is the first time that Darlene’s user account has signed in to Office 365.
Notice that you were not prompted to change Darlene’s password when first
signing in. This is because her account password is now synchronized with the
on-premises Active Directory.
j.
In the top navigation menu, click Darlene Patton or the user
icon, and then click Sign out.
k.
Close Internet Explorer.
l.
Click Start and then, on the Start screen, click Norman Eagle
and then click Sign out.
In this exercise, you will review the administrator roles
used in Office 365 and Exchange Online and review how those roles are
associated.
Virtual Machines
The following virtual machine will be used during this
exercise:
· SRV1
Tasks
38. Review
admin roles in Office 365.
a.
Switch to SRV1 and the Office 365 admin center.
b.
In the feature pane, click Active Users.
c.
In the ACTIVE USERS list, double-click Darlene Patton.
d.
In the left navigation, click Settings.
e.
Under Assign role, click Yes.
f.
Click the Select a role menu, and then review the available
administer roles that you can assign:
Billing administrator:
Makes purchases, manages subscriptions, manages support tickets, and monitors
service health.
If you did not purchase Office
365 from Microsoft, you cannot make billing changes and therefore you cannot be
assigned the billing admin role. For billing issues, contact the admin at the
organization where you purchased your subscription.
Global administrator: Has
access to all administrative features. Global admins are the only admins who
can assign other admin roles. You can have more than one global admin in your
organization. The person who signs up to purchase Office 365 becomes a global
admin.
Password administrator:
Resets passwords, manages service requests, and monitors service health.
Password admins are limited to resetting passwords for users and other password
admins.
Service administrator:
Manages service requests and monitors service health.
Before global admins can assign
the service admin role to a user, they first assign the user administrative
permissions to a service, such as Exchange Online, and then assign the service
admin role to the user in Office 365.
User management administrator:
Resets passwords, monitors service health, and manages user accounts, user
groups, and service requests. The user management admin cannot delete a global
admin, create other admin roles, or reset passwords for billing, global, and
service admins.
Certain administrator roles in
Office 365 Enterprise and Office 365 Midsize Business have a corresponding role
in Exchange Online, SharePoint® Online, and Lync® Online.
See the following table to learn how these Office 365 administrator roles
translate into roles in the different Office 365 services.
|
Office
365 admin role
|
Role
in Exchange Online
|
Role
in SharePoint Online
|
Role
in Lync Online
|
|
Global administrator
|
Exchange Online administrator
Company Administrator
|
SharePoint Online administrator
|
Lync Online
administrator
|
|
Billing administrator
|
N/A
|
N/A
|
Lync Online
administrator
|
|
Password administrator
|
Help Desk administrator
|
N/A
|
Lync Online
administrator
|
|
Service administrator
|
N/A
|
N/A
|
Lync Online
Administrator
|
|
User management administrator
|
N/A
|
N/A
|
Lync Online
administrator
|
g.
Click Password administrator.
h.
In the Alternate email address box, type an email address you
have access to, and then click Save.
39. Review
admin roles in Exchange Online.
a.
In the Office 365 admin center, in the feature pan, under Admin,
click Exchange.
b.
In the Exchange admin center, feature pane, click permissions.
c.
On the admin roles tab, in the admin roles list, click HelpdeskAdmins_X.
The X represent a unique set of numbers for your tenant’s Help desk admins
group.
d.
In the details pane, notice that Darlene is a member of this group. Read
the description for this role in the details pane.
If Darlene Patton is not listed
as a member of the group, on the toolbar above the admin roles list,
click Refresh. You may need to wait 1-2 minutes and then click Refresh
again to see the updated group membership.
e.
In the admin roles list, click Help Desk.
In the details pane, notice that
the HelpdeskAdmins group is not automatically assigned to the Help Desk group.
f.
In the admin roles list, click each of the built-in roles and
review their description in the details pane.
40. Review
admin roles in SharePoint Online.
There
are three administrative roles in the SharePoint Online service administration:
Global administrator: The administrator of the Office 365 account, with
permissions to manage service licenses, users and groups, domains, and
subscribed services.
SharePoint Online service
administrator: The administrator of the
SharePoint Online admin center, with permissions to create and manage site
collections. In Office 365, the Global administrator is also the SharePoint
Online service administrator.
Site collection administrator: A user with administrative permissions to manage a
site collection. There can be only one primary administrator and several
administrators for a site collection. The SharePoint Online service
administrator should assign permissions to the primary site collection
administrator when creating a site collection, and can later add more
administrators for the site collection.
The
SharePoint Online service administrator in Office 365 for enterprises has
access to a special administrative site called SharePoint Online admin center.
It is from this site that the SharePoint Online Administrator can assign other
users as site collection administrators.
A
site collection is the root of permissions for all the sites (known as
subsites) underneath it. Site collection administrators have permissions to
manage SharePoint Online at the site collection level (or top level) of a
SharePoint Online site, meaning that their permissions extend to all the
content in the site collection that they administer. Also, those permissions
are inherited down through all the subsites underneath the site collection, by
default. This means changes that site collection administrators make at
http://www.contoso.com/ are inherited in subsites like
http://www.contoso.com/InformationTechnology. It is important to note that a
new site collection is its own permissions root. For example, a new top-level
site collection created at http://www.contoso.com/sites/Marketplace does not
have the same permissions as http://www.contoso.com/.
The
majority of users of a SharePoint Online site will be non-administrators. They
may be assigned to a default SharePoint Online security group (such as Members,
Owners, Viewers, or Visitors), or they may be placed in custom groups created
by the site owner or site collection administrators. It is preferable to place
users into groups, instead of giving them permissions to the site on an
individual basis. Granting a large number of users individual permissions
creates management issues.
a.
In the top navigation, click Admin.
b.
In the Office 365 admin center, in the feature pane, under Admin,
click SharePoint.
c.
In the SharePoint admin center, in the site collections feature, review
the site collections.
You may need to wait until the
site collections finish loading.
d.
Under Site Collections, point to the https://yourtenantdomainname.sharepoint.com
URL and then select the check box to the left.
e.
In the ribbon bar, click Owners, and then click Manage
Administrators.
f.
In the manage administrators window, review the roles that can be
assigned to a site. After a user is assigned to a role, that user will have the
ability to manage access to the site.
Close the window.
g.
In the top navigation menu, click your tenant administrator name or user
icon, and then click Sign Out.
h.
Close Internet Explorer and all open tabs.

Lab 03: Performing a Staged Exchange Migration with
Office 365
Lab: Performing a Staged Exchange Migration
with Office 365
During this lab, you will migrate users from the on-premises
Microsoft® Exchange 2007 organization to Microsoft Office 365™
using staged migration. You will also prepare and create a staged migration
batch, and then convert the user accounts on-premises to mail-enabled users.
Estimated time to complete: 60 minutes
Before You Begin
Before you can complete this lab, you must have complete all
previous labs.
What You Will Learn
After completing the exercises, you will be able to:
· Create
a migration endpoint.
· Test
Exchange connectivity.
· Create
a CSV file for user migration.
· Create
a migration batch and migrate users to Microsoft Exchange Online.
· Convert
on-premises user accounts to mail-enabled users.
Scenario
You are now ready to move a subset of your on-premises users
from Exchange 2007 to Exchange Online in Office 365. You must first verify
connectivity using the Microsoft Remote Connectivity Analyzer tool, and then
create a migration endpoint that will be used by Exchange Online to migrate
your mailboxes to the cloud. After the users have been migrated, you need to
convert the users from mailbox-enabled to mail-enabled users so that mail
destined for the users will be properly routed to their new mailboxes in
Exchange Online.
Exercise 0: Preparing the Lab Environment
In this exercise, you will prepare the lab environment by
connecting to the necessary virtual machines using the Windows Server®
2012 R2 Hyper-V® Manager.
Virtual Machines
The following virtual machines will be used during this
exercise:
· DC1
· MBX1
· MBX2
· SRV1
· SRV2
· CL1
· TMG1
Tasks
3.
Verify that the virtual machines are running.
The virtual machines from the previous lab should
still be running. Use the Hyper-V Manager window to verify that the virtual
machine statuses are running.
Exercise 1: Preparing for a Staged Migration
In this exercise, you will verify that the on-premises
organization is prepared for mailbox migration. You will use the Microsoft
Remote Connectivity Analyzer tool to verify connectivity prior to migrating
mailboxes.
Virtual Machines
The following virtual machine will be used during this
exercise:
· MBX1
Tasks
41. Verify
that Outlook® Anywhere is enabled in the on-premises Exchange
organization.
a.
Switch to MBX1 signed in as Onprem\Administrator.
b.
Switch to the Exchange Management Shell.
c.
In the Exchange Management Shell, type the following and then press
Enter:
Get-ClientAccessServer | fl *anywhere*
Verify that OutlookAnywhereEnabled reads True.
42. Use
the Microsoft Remote Connectivity Analyzer to verify connectivity.
On MBX1, open
Internet Explorer and browse to https://testconnectivity.microsoft.com
a.
On the Microsoft Remote Connectivity Analyzer page, on the Exchange
Server tab, under Microsoft Office Outlook Connectivity Tests, click
Outlook Autodiscover.
b.
Scroll down and then click Next.
c.
In the Email address and Domain\User name (or UPN) boxes,
type BasilM@yourlabdomainname.
Your lab
domain name will be in the form of LabXXXXX.O365Ready.com where XXXXX is your
lab number.
d.
In the Password and Confirm password boxes, type Pa$$w0rd
e.
Select the I understand that I must use the credentials of a working
account from my Exchange domain to be able to test connectivity to it remotely.
check box.
f.
Under Verification, type the characters shown and then click Verify.
g.
Scroll down and then click Perform Test.
h.
In the test results, verify that no tests have failed. You may see a
warning for the certificate chain. This can be ignored.
43. Use
the EAC to create an Outlook Anywhere migration endpoint.
a.
On MBX1, in Internet Explorer,
browse to http://portal.office.com
b.
On the Office 365 page, in the Sign in with your
organizational account box, type your tenant administrator user name.
c.
In the Password box, type your
tenant administrator password and then click Sign in.
d.
In the top navigation menu, click Home.
e.
In the feature pane, under ADMIN, click Exchange.
f.
On the dashboard page, under recipients, click migration.
g.
Above the migration list, on the toolbar, click the ellipsis, and
then click Migration endpoints.
h.
In the Migration Endpoints window, on the toolbar, click New.
i.
In the Migration Endpoint Wizard window, click Outlook Anywhere
and then click next.
j.
On the Enter on-premises account credentials page, in the Email
address box, type Administrator@yourlabdomainname.
k.
In the Account with privileges box, type Onprem\Administrator
l.
In the Password of account with privileges box, type Pa$$w0rd
and then click next.
The on-premises user account
used to connect to your on-premises Exchange organization (also called the
migration administrator) must have the necessary permissions to access and
modify the on-premises mailboxes that you want to migrate to Exchange Online.
This user account is used to create a migration endpoint to your on-premises
organization.
The following list shows the
administrative privileges required to migrate mailboxes using a staged
migration. There are three possible options:
· The
migration administrator must be a member of the Domain Admins group in Active
Directory® in the on-premises organization.
Or
· The
migration administrator must be assigned the FullAccess permission for each
on-premises mailbox AND the WriteProperty permission to modify the TargetAddress
property on the on-premises user account.
Or
· The
migration administrator must be assigned the Receive As permission on the
on-premises mailbox database that stores the user mailboxes AND the
WriteProperty permission to modify the TargetAddress property on the
on-premises user account.
For the purpose of this lab, you
will be using the domain administrator account as the migration administrator.
m.
On the Confirm the migration endpoint page, verify that the Exchange
server is MBX1.Onprem.local and that the RPC proxy server is mail.yourlabdomainname,
and then click next.
If the migration endpoint is not
automatically completed or incorrect, click back and verify that you are
using the correct credentials for the on-premises lab domain name and user
name.
n.
On the Enter general information page, in the Migration endpoint name
box, type On-premises Exchange 2007
o.
In the Maximum concurrent migrations box, type 20
p.
In the Maximum concurrent incremental syncs box, type 10
and then click new.
q.
On the migration endpoints page, click close.
Exercise 2: Creating a Staged Migration Batch
In this exercise, you will create the necessary comma
separated file used to identify the mailboxes that will be migrated to Exchange
Online. You will then create and start a migration batch.
Virtual Machines
The following virtual machine will be used during this
exercise:
· MBX1
Tasks
44. Create
a CSV file for users who will be moved to Exchange Online.
The
CSV file for a staged migration supports three attributes, EmailAddress, Password,
and ForceChangePassword. Each row in
the CSV file corresponds to a mailbox. The Password and ForceChangePassword attributes are optional. In this lab, you will only
use the user’s primary email address attribute in the CSV file, because the
user’s accounts and passwords are managed on-premises and they are already
being synchronized using Azure AD Sync which was installed and configured in an
earlier lab.
a.
On MBX1, click Start and then click Notepad.
b.
Type the following text into Notepad. Replace
"yourlabdomainname" with your on-premises lab domain name.
EmailAddress
BasilM@yourlabdomainname
DarleneP@yourlabdomainname
NormanE@yourlabdomainname
RamonaH@yourlabdomainname
TeresaC@yourlabdomainname
c.
On the menu, click File and then click Save as.
d.
Click the Save as type menu and then click All Files.
e.
In the File name box, type C:\LabFiles\Migrate.CSV and
then click Save.
If the CSV file contains
non-ASCII or special characters, save the CSV file with UTF-8 or other Unicode
encoding. Depending on the application, saving the CSV file with UTF-8 or other
Unicode encoding may be easier when the system locale of the computer matches
the language used in the CSV file.
f.
Close Notepad.
45. Create a staged migration
batch.
a.
On MBX1, switch to Internet Explorer and the Exchange admin center.
b.
On the migration tab, on the toolbar, click New and then
click Migrate to Exchange Online.
and then
click Migrate to Exchange Online.
c.
On the Select a migration type page, click Staged migration, and
then click next.
d.
On the Select the users page, click Browse.
e.
In the Choose File to Upload window, browse to C:\LabFiles, click
Migrate.CSV, and then click Open.
Verify that 5 mailboxes to
migrate is displayed on the page. You may have to wait until the number of
mailboxes is updated or click next, and then click back to see
the updated number.
f.
Click next.
g.
On the Confirm the migration endpoint page, review the migration
endpoint that was created earlier, and then click next.
h.
On the Move configuration page, in the New migration batch name
box, type Migrate from Exchange 2007 and then click next.
i.
On the Start the batch page, review the recipient who will receive the
migration batch report. Select the Manually start the batch later option
and then click new.
Manually starting the migration
batch is useful when an administrator wants to prepare a migration and start it
when it is more convenient or when network bandwidth may be more available.
46. Start
a staged migration batch.
a.
In the migration batches list, click Migrate from
Exchange 2007.
b.
On the toolbar, click Start  .
.
c.
In the warning dialog box, click yes.
d.
Review the status of the migration batch. On the toolbar, click Refresh.
Periodically click Refresh to update the status of the migration batch list
until the Migration from Exchange 2007 migration batch status reads Synced.
You can click View details
in the details pane to see the synchronization of individual accounts.
This may take 10-15 minutes to
complete.
e.
If the synchronization fails and there are mailboxes listed as FAILED,
refresh the migration list until the STATUS reads Synced with errors,
and then click Resume , and
wait for the synchronization to run and complete again.
Exercise 3: Converting On-Premises Mailboxes to
Mail-Enabled Users
In this exercise, you will convert the on-premises mailboxes
that were migrated to Exchange Online to mail-enabled users on-premises.
Virtual Machines
The following virtual machines will be used during this
exercise:
· MBX1
Tasks
47. Run
the ExportO365UserInfo.ps1 script to create the cloud.csv file.
a.
On MBX1, open Windows Explorer and browse to C:\LabFiles.
b.
Right-click Migrate.CSV and then click Rename.
c.
Change the filename to Migration.csv and then press Enter.
The scripts used for converting
the mailbox-enabled users to mail-enabled users expect the reference file to be
named Migration.csv.
d.
Switch to the Exchange Management Shell.
If the Exchange Management Shell
is not open, click Start and then click Exchange Management Shell.
e.
In the Exchange Management Shell, type the following and then press
Enter:
Get-MailUser
Notice that there are no mail
users in the organization.
f.
In the Exchange Management Shell, type the following and then press
Enter:
CD C:\LabFiles
g.
In the Exchange Management Shell, type the following and then press
Enter:
.\ExportO365UserInfo.ps1
h.
In the Windows PowerShell® Credential Request window, in the User
name box, type your tenant administrator user name.
i.
In the Password box, type your tenant administrator password and
then press Enter.
The script will connect to
Exchange Online and create a file named Cloud.csv in the working directory that
will be used to convert mailboxes to mail enabled users.
j.
Wait for the script to complete and then switch to Windows Explorer.
k.
In C:\LabFiles, verify that the cloud.csv file has been created.
The cloud.csv file contains the
user’s LegacyExchangeDN, CloudEmailAddress, OnPremiseEmailAddress, and
MailboxGUID information.
48. Run
the Exchange2007MBtoMEU.ps1 script to convert migrated user mailboxes to mail
enabled users.
a.
Switch to the Exchange Management Shell.
b.
In the Exchange Management Shell, type the following and then press
Enter:
.\Exchange2007MBtoMEU.ps1 DC1.Onprem.local
c.
In the Exchange Management Shell, type the following and then press
Enter:
Get-MailUser
Notice that the users who were
migrated to Exchange Online have been converted to mail enabled users.
Exercise 4: Completing the Migration and Post
Migration Tasks
In this exercise, you will delete the staged migration batch
and review post migration tasks that may be performed when all users have been
migrated to Exchange Online.
Virtual Machines
The following virtual machine will be used during this
exercise:
· MBX1
Tasks
49. Delete
a staged migration batch.
a.
On MBX1, switch to Internet Explorer and the Exchange admin center.
b.
On the migration tab, in the migration batch list,
click Migrate from Exchange 2007.
c.
On the toolbar, click Delete  .
.
d.
In the warning dialog box, click yes.
e.
On the toolbar, click Refresh.
Periodically click Refresh until
the migration batch has been removed from the migration batch list.
f.
In the top navigation menu, click your tenant administrator name or user
icon, and then click Sign out.
g.
Close Internet Explorer and all tabs.
50. Force
directory synchronization.
a.
Switch to SRV1 and Windows PowerShell.
Change the working directory to
C:\Program Files\Microsoft Azure AD Sync\Bin if it not already at that
location.
b.
At the Windows PowerShell command prompt, type the following and then
press Enter:
.\DirectorySyncClientCmd.exe delta
Review the output of the
command.
c.
Switch to the Synchronization Service Manager and review the updates to
the directories by selecting the different connector operations.
51. Review post migration tasks.
For
the lab environment, you will not complete post migration tasks. The
on-premises Exchange organization will continue to be used.
Review
the following post migration tasks that an organization would perform after all
mailboxes have been migrated to Exchange Online:
·
Assign licenses to Office 365 users.
When you migrate a user's mailbox to Exchange Online using a staged migration,
an Office 365 user account is created for the user. You have to activate this
user account by assigning a license. If you do not assign a license, the
mailbox will be disabled when the grace period ends.
·
Create an Autodiscover DNS record.
If you have migrated all on-premises mailboxes to Exchange Online, and you are
planning to completely transition your on-premises organization to Office 365,
you can configure an Autodiscover DNS record for your Office 365 organization
to enable users to connect to their new Exchange Online mailboxes with
Microsoft Outlook and mobile clients. This new Autodiscover DNS record has to
use the same namespace that you are using for your Office 365 organization. For
example, if your cloud-based namespace is contoso.onmicrosoft.com, the
Autodiscover DNS record you need to create is
autodiscover.contoso.onmicrosoft.com.
Exchange Online uses a CNAME record to implement the
Autodiscover service for Outlook and mobile clients.
·
Configure your MX record to point to your Office 365 organization. Until you change your MX record, email sent to
users is still routed to their on-premises Exchange mailboxes, and then
forwarded to the corresponding Exchange Online mailbox. This lets users use
their Exchange Online mailbox to access email sent to their on-premises
mailbox. When you configure your organization's MX record to point to your
Office 365 email organization, all email is sent directly to the Exchange Online
mailboxes.
Important:
It can take from 24 to 72 hours for the updated MX
record to be propagated. Wait at least 24 hours after you change the MX record,
and then verify that mail is being routed directly to Exchange Online
mailboxes.
·
Decommission on-premises Exchange servers. After you have verified that all email is being routed directly to
the Exchange Online mailboxes, and you have completed the migration of all
mailboxes, and you no longer need to maintain your on-premises email
organization or do not plan on implementing a single sign-on solution, you can
uninstall Exchange from your servers and remove your on-premises Exchange
organization.
Lab 04: Performing an Exchange Hybrid Deployment with
Office 365
Lab: Performing an Exchange Hybrid Deployment
with Office 365
During this lab, you will install and configure a Microsoft®
Exchange 2013 server to operate as a hybrid server for the Exchange 2007
organization. You will also set up hybrid coexistence with Microsoft Exchange
Online, and become familiar with the experience that clients will have while
running in a hybrid organization. Finally, you will configure your on-premises
public folders so that they are available to Exchange Online user mailboxes.
Estimated time to complete: 2 hours 40 minutes
Before You Begin
Before you can complete this lab, you must have completed
all previous labs.
What You Will Learn
After completing the exercises, you will be able to:
· Install
Exchange 2013 Client Access server.
· Use
the hybrid deployment wizard.
· Configure
Exchange URLs for internal and external services.
· Manage
aspects of a hybrid deployed organization.
· Share
on-premises public folders with cloud users.
Scenario
Your organization is taking the next step toward migrating
to Microsoft Office 365™. You have already migrated some users to
Exchange Online, but now you want to configure your on-premises organization to
use a hybrid deployment. After it is deployed, you need to migrate mailboxes,
manage the environment, and become familiar with the experience that your users
will have. You also have on-premises public folders that must be made available
to all users in the organization, regardless of whether their mailboxes
location is either on-premises or in Exchange Online.
Exercise 0: Preparing the Lab Environment
In this exercise, you will prepare the lab environment by
connecting to the necessary virtual machines using the Windows Server®
2012 R2 Hyper-V® Manager.
Virtual Machines
The following virtual machines will be used during this
exercise:
· DC1
· MBX1
· MBX2
· SRV1
· SRV2
· CL1
· TMG1
Tasks
4.
Verify that the virtual machines are running.
The virtual machines from the previous lab should
still be running. Use the Hyper-V Manager window to verify that the virtual
machine statuses are running.
Exercise 1: Installing the Exchange 2013 Hybrid
Server
In this exercise, you will install an Exchange 2013 server
to act as the hybrid server for the Exchange 2007 organization.
Virtual Machines
The following virtual machines will be used during this
exercise:
· DC1
· TMG1
· MBX1
· MBX2
Tasks
52. Install
the Exchange 2013 Client Access and Mailbox server roles.
The
Exchange Server 2013 CU7 prerequisites have already been installed on MBX2.
a.
Switch to MBX2 signed on as Onprem\Administrator.
b.
Open File Explorer and browse to C:\LabFiles\Exchange2013CU7.
c.
Double-click setup.exe.
d.
In the MICROSOFT EXCHANGE SERVER 2013 CUMULATIVE UPDATE 7 SETUP window,
on the Check for Updates page, click Don’t check for updates right now,
and then click next.
Wait for the files to be copied to the local computer
and setup to initialize.
e.
On the Introduction page, click next.
f.
On the License Agreement page, click I accept the terms in the
license agreement and then click next.
g.
On the Recommended Settings page, review the default settings, and then
click next.
h.
On the Server Role Selection page, select the Mailbox role and Client
Access role check boxes, and then click next.
i.
On the Installation Space and Location page, review the default setting
and then click next.
j.
On the Malware Protection Settings page, review the default setting, and
then click next.
Wait for the readiness checks to complete.
k.
On the Readiness Checks page, review the warning message and then click install.
The installation may take 40-60 minutes.
l.
On the Setup Complete page, review the information and then click finish.
m.
Point to the lower right corner and, in the Charms menu, click Settings,
click Power, and then click Restart.
n.
In the Choose a reason that best describes why you want to shut down
this computer menu, click Other (Planned) and then click Continue.
MBX2 will restart and automatically sign in as
Onprem\Administrator.
53. Update
DNS records to use the new Exchange 2013 CAS.
a.
Switch to DC1.
b.
On the taskbar, click Server Manager.
c.
In Server Manager, on the menu, click Tools and then click DNS.
d.
In the console tree, expand Forward Lookup Zones and then click
your lab domain name DNS zone.
e.
Right-click your lab domain name DNS zone and then click New Host (A
or AAAA).
f.
In the New Host window, in the Name box, type hybrid
The hybrid host will be the name
used to route traffic to the new Exchange 2013 server.
g.
In the IP address box, type 192.168.0.160 and then click Add
Host.
h.
In the DNS dialog box, click OK.
i.
In the New Host window, in the Name box, type autodiscover
j.
In the IP address box, type 192.168.0.160 and then click Add
Host.
k.
In the DNS dialog box, click OK.
l.
In the New Host window, click Done.
m.
Close the DNS Manager.
n.
Switch to TMG1 and the DNS Manager.
o.
In the console tree, right-click your lab domain name DNS zone and then
click New Host (A or AAAA).
p.
In the New Host window, in the Name box, type hybrid
q.
In the IP address box, type your public IP address and then click
Add Host.
r.
In the DNS dialog box, click OK.
s.
In the New Host window, click Done.
54. Update
TMG firewall rules to redirect inbound SMTP and Client Access to Exchange 2013.
a.
Click Start and then click Forefront TMG Management.
b.
In the results pane, on the All Firewall Policy tab, double-click
Inbound SMTP.
c.
In the Inbound SMTP window, click the To tab.
d.
In the Specify the network address of the server to publish box,
change the IP address to 192.168.0.160 and then click OK.
e.
Click Hybrid Web Access.
This rule was updated using the
configuration script in Lab 0.
f.
In the actions pane, click the Tasks tab.
g.
On the Tasks tab, click Move Selected Rules Up and move
the Hybrid Web Access rule above the Exchange Web Access rule. This will direct
all external client access traffic inbound for Exchange to the Exchange 2013
server.
h.
In the results pane, click Apply.
i.
In the Configuration Change Description window, click Apply and
then click OK.
55. Configure
certificates and Exchange URLs using the Exchange admin center.
a.
Switch to MBX2.
b.
Open Internet Explorer and browse to https://mbx2/ecp/?ExchClientVer=15
This special URL must be used
while the Administrator mailbox is located in an Exchange 2007 mailbox
database.
c.
On the Exchange Admin Center page, sign in as Onprem\Administrator with
a password of Pa$$w0rd
d.
In the feature pane, click servers.
In the warning dialog
box, click ok. The expired trial period will affect this lab.
e.
In the results pane, click the certificates tab.
f.
On the toolbar above the certificates list, next to the Refresh
icon, click the ellipsis, and then click Import Exchange Certificate.
g.
In the Exchange Certificate window, in the File to import from
box, type \\MBX1\C$\LabFiles\LabCert.pfx
h.
In the Password box, type Pa$$w0rd and then click next.
i.
On the Import Exchange certificate page, click the Add icon.
j.
In the Select a Server window, click MBX2, click add, and
then click ok.
k.
On the Import Exchange certificate page, click finish.
l.
In the certificates list, double-click Lab Certificate.
This should be the first
certificate listed.
m.
In the Exchange Certificate window, in the left navigation, click services.
n.
In the services list, select the SMTP and IIS check
boxes and then click save.
o.
In the warning dialog box, click yes.
p.
Click the virtual directories tab.
q.
Click the Select server menu and then click MBX2.Onprem.local.
r.
On the toolbar, click Configure .
.
s.
In the configure external access domain window, on the toolbar, click Add
 .
.
t.
In the Select a Server window, click MBX2, click add, and
then click ok.
u.
In the Enter the domain name you will use with your external Client
Access, type hybrid.LabXXXXX.O365Ready.com where XXXXX is your lab
number, and then click save.
v.
When completed successfully, click close.
This will update the external
URLs for all your Exchange 2013 virtual directories on MBX2.
w.
Close Internet Explorer.
56. Update
internal Exchange URLs using the Exchange Management Shell.
a.
On MBX2, on the desktop, point to the lower left corner, and then click Start.
b.
On the Start screen, click Exchange Management Shell.
c.
In the Exchange Management Shell, type the following and then press
Enter. Replace the five X’s with your lab number.
Set-OwaVirtualDirectory -Identity "MBX2\OWA
(Default Web Site)" -InternalUrl https://hybrid.LabXXXXX.O365Ready.com/OWA
d.
In the Exchange Management Shell, type the following and then press
Enter. Replace the five X’s with your lab number.
Get-EcpVirtualDirectory -Server MBX2 |
Set-EcpVirtualDirectory -InternalUrl https://hybrid.LabXXXXX.O365Ready.com/ecp
e.
In the Exchange Management Shell, type the following and then press
Enter. Replace the five X’s with your lab number.
Get-ActiveSyncVirtualDirectory -Server MBX2 |
Set-ActiveSyncVirtualDirectory -InternalUrl https://hybrid.LabXXXXX.O365Ready.com/Microsoft-Server-Activesync
f.
In the Exchange Management Shell, type the following and then press
Enter. Replace the five X’s with your lab number.
Get-WebServicesVirtualDirectory -Server MBX2 |
Set-WebServicesVirtualDirectory -InternalUrl https://hybrid.LabXXXXX.O365Ready.com/EWS/Exchange.asmx
g.
In the Exchange Management Shell, type the following and then press
Enter. Replace the five X’s with your lab number.
Set-ClientAccessServer -Identity MBX2 -AutoDiscoverServiceInternalUri
https://hybrid.LabXXXXX.O365Ready.com/Autodiscover/Autodiscover.xml
57. Update
Microsoft Outlook® Anywhere URLs and authentication methods.
a.
On MBX2, in the Exchange Management Shell, type the following and then
press Enter. Replace the five X’s with your lab number.
Get-OutlookAnywhere -Server MBX2 | Set-OutlookAnywhere
-InternalHostname hybrid.LabXXXXX.O365Ready.com
-InternalClientsRequireSsl $true -ExternalHostname hybrid.LabXXXXX.O365Ready.com
-ExternalClientAuthenticationMethod Ntlm -ExternalClientsRequireSsl
$true
b.
In the Exchange Management Shell, type the following and then press
Enter.
IISReset
Wait for the command to
complete.
c.
Switch to MBX1 and the Exchange Management Shell.
d.
In the Exchange Management Shell, type the following and then press
Enter.
Set-OutlookAnywhere -Identity "MBX1\Rpc
(Default Web Site)" -ClientAuthenticationMethod
Ntlm -IISAuthenticationMethods Basic,Ntlm
e.
In the Exchange Management Shell, type the following and then press
Enter.
IISReset
Wait for the command to
complete.
f.
In the Exchange Management Shell, type the following and then press
Enter.
Get-OutlookAnywhere | FL ServerName,Name,*auth*
Verify that the authentication
methods for MBX1 and MBX2 match.
58. Verify
Outlook Web App client connectivity.
a.
On MBX1, open Internet Explorer and browse to https://hybrid.LabXXXXX.O365Ready.com/owa
where XXXXX is your lab number.
b.
On the Outlook Web App page, in the Domain\user name box, type BobK@yourlabdomainname
c.
In the Password box, type Pa$$w0rd and then click sign
in.
d.
On the Outlook Web Access page, accept the current values and then click
OK.
e.
In Internet Explorer, in the address bar, review the URL.
Notice that Exchange 2013
Outlook Web App redirected the user to the Exchange 2007 Client Access server.
f.
(Optional) On your computer, this is a computer that is outside of the
lab environment and not one of the virtual machines, open an Internet browser
and browse to https://hybrid.LabXXXXX.O365Ready.com/owa where XXXXX is
your lab number.
g.
On the Outlook Web App page, in the Domain\user name box, type BobK@yourlabdomainname
h.
In the Password box, type Pa$$w0rd and then click sign
in.
Verify that you were redirected
to the Exchange Server 2007 Outlook Web Access page.
i.
In the upper right corner, click Log Off and then close the
Internet browser.
59. Verify
mail flow.
a.
Switch to MBX1 and Outlook Web Access, signed in as Bob Kelly.
b.
On the toolbar, click New.
c.
In the To box, type an email address that you have access to and
not one that is part of the lab domain. Do not send an email to one of your
tenant user accounts.
d.
In the Subject box, type This is a test and then click Send.
e.
Press Ctrl+Shift+P to open a new Microsoft InPrivate® browser
window.
f.
Browse to your external account’s email web access page and sign in.
g.
In the Inbox, verify that you have received the email from Bob Kelly.
Reply to the message.
h.
In the message body, type Good test and then send the message.
i.
Sign out of your web email and then close the InPrivate Internet
Explorer window.
j.
Switch to Outlook Web Access signed in as Bob Kelly.
k.
In the message list, double-click the email from your external email
account.
You may have to wait for the
message to arrive.
l.
On the toolbar, click Message Details  .
.
m.
In the Message Details window, review the Internet Mail Headers and
notice that the email was sent through MBX2, which is the newly deployed
Exchange 2013 server. Click Close.
n.
Close the message window and then close Internet Explorer.
Exercise 2: Enabling Exchange Federation
In this exercise, you will run the Exchange hybrid
deployment wizard and establish a hybrid organization between your on-premises
Exchange organization and Exchange Online in Office 365.
Virtual Machines
The following virtual machines will be used during this
exercise:
· TMG1
· MBX2
· SRV1
Tasks
60. Enable
Exchange hybrid deployment in Azure AD Sync.
a.
Switch to SRV1.
b.
On the desktop, point to the lower left corner, and then click Start.
c.
On the Start screen, click, DirectorySyncTool.
d.
In the Microsoft Azure Active Directory Sync Services window, on the
Connect to Azure AD page, click Next.
e.
On the Connect to AD DS page, click Next.
f.
On the Uniquely identifying your users page, click Next.
g.
On the Optional features page, select the Exchange hybrid deployment
check box, and then click Next.
h.
On the Ready to configure page, and then click Configure.
i.
On the Finished page, select the Synchronize now check box, and
then click Finish.
Selecting the Synchronize now
check box will enable the Azure AD Sync Scheduler task in Task Scheduler. If
you do not select the Synchronize now check box, you will need to open Task
Scheduler and enable the Azure AD Sync Scheduler task in order for
synchronization to occur automatically every three hours.
61. Add
Organizational Units to DirSync and force directory synchronization.
a.
On SRV1, switch to the Synchronization Service Manager.
If the Synchronization Service
Manager is not open, open the Start screen and then click Synchronization
Service.
b.
In the Synchronization Service Manager window, on the toolbar, click Connectors.
c.
In the Connectors list, double-click Onprem.local.
d.
In the Properties window, in the Connector Designer pane, click Configure
Directory Partitions.
e.
In the results pane, click Containers.
f.
In the Password box, type Pa$$w0rd and then click OK.
g.
In the Select Containers window, select the Accounts and Managers
containers check boxes.
h.
You should now have the Accounts, Managers, and Online
containers selected. Click OK.
i.
In the Properties window, click OK.
j.
Switch to Windows PowerShell.
k.
At the Windows PowerShell command prompt, type the following and then
press Enter:
.\DirectorySyncClientCmd.exe initial
Review the output for the
command.
62. Add
your lab domain to the Local intranet sites zone in Internet Explorer.
a.
Switch to MBX2.
b.
Open Internet Explorer and browse to https://hybrid.LabXXXXX.O365REady.com/ecp/?ExchClientVer=15
where XXXXX is your lab number.
c.
On the Exchange Admin Center page, sign in as Onprem\Administrator
with a password of Pa$$w0rd
d.
In Internet Explorer, in the upper right corner, click the Tools
icon and then click Internet options.
e.
In the Internet Options window, click the Security tab.
f.
In the Select a zone to view or change security settings section,
click Local intranet, and then click Sites.
g.
In the Local intranet window, click Advanced.
h.
In the Add this website to the zone box, type *.LabXXXXX.O365Ready.com
where XXXX is your lab number, click Add, and then click Close.
i.
In the Local intranet window, click OK.
j.
In the Internet Properties window, click OK.
63. Use
the hybrid configuration wizard to create a hybrid deployment.
a.
On MBX2, in Internet Explorer, on the address bar, click the Refresh icon.
b.
In the Exchange admin center, in the feature pane, click hybrid.
c.
On the setup tab, click enable.
d.
In the information dialog box, review the requirement and then
click sign in to Office 365.
This will sign you in to
Exchange Online.
e.
On the Office 365 page, in the Sign in with your organization account
box, type your Office 365 tenant administrator account.
f.
In the Password box, type your tenant administrator password and
then click Sign in.
g.
In the Exchange admin center, on the setup tab, click enable.
h.
In the Exchange Hybrid window, read the information and then click yes.
i.
On the Set up Exchange Hybrid page, read the information. A TXT record
must be created in the domain’s public DNS zone. For this virtual environment,
the public DNS server is located on TMG1. Click Click to copy to clipboard.
j.
On the desktop, point to the lower left corner, right-click Start,
and then click Run.
k.
In the Open box, type Notepad and then press Enter.
l.
Right-click in the note body and then click Paste.
m.
Verify that you have the TXT record data copied into Notepad. Click File
and then click Save as.
n.
In the File name box, type C:\LabFiles\FedText.txt and
then click Save.
o.
Close Notepad.
p.
Switch to TMG1.
q.
Click Start and then click Run.
r.
In the Open box, type \\MBX2\C$\LabFiles and then press
Enter.
s.
In Windows Explorer, double-click FedText.txt.
Resize the Notepad window so
that you are able to see the full text data.
t.
Select only the text data located after the colon in your lab domain
name and then press Ctrl+C to copy the text data.
u.
Switch to DNS Manager.
v.
In the DNS Manager window, in the console tree, right-click your lab
domain name DNS zone, and then click Other New Records.
w.
In the Resource Record Type window, in the Select a resource record
type list, scroll down, click Text (TXT), and then click Create
Record.
x.
In the New Resource Record window, right-click in the Text box
and then click Paste.
y.
Review the text data and then click OK.
Do not type any information in
the Record name box.
z.
In the Resource Record Type window, click Done.
aa.
Close DNS Manager.
bb.
Close Notepad and close Windows Explorer.
cc.
Switch to MBX2 and the Exchange Hybrid window.
dd.
In the Exchange Hybrid window, click next.
ee.
On the Set up Exchange Hybrid page, review the information for mail
transport, and then click More options.
ff.
Review the information for centralized mail transport. This will not be
configured as part of this lab. Verify that the Configure my Client Access
and Mailbox servers for secure mail transport option button is selected,
and then click next.
gg.
Under Receiving Client Access servers, click browse.
hh.
In the Select a Server window, click MBX2, click add, and
then click ok.
This Client Access server will
be configured with a Receive connector for bi-directional secure mail transport
between the on-premises Exchange and Exchange Online organizations.
ii.
On the Set up Exchange Hybrid page, click next.
jj.
Under Sending Mailbox servers, click browse.
kk. In the Select a Server
window, click MBX2, click add, and then click ok.
The Mailbox servers selected
here will be configured with a Send connector for bidirectional secure mail
transport between the on-premises Exchange and Exchange Online organizations.
ll.
On the Set up Exchange Hybrid page, verify Lab Certificate is
shown as the certificate that will be used for hybrid mail transport, and then
click next.
mm.
On the Set up Exchange Hybrid page, in the certificates menu,
verify that Lab Certificate is listed and then click next.
nn.
In the fully qualified domain name for your on-premises organization
box, type hybrid.LabXXXXX.O365Ready.com where XXXXX is your lab number,
and then click next.
oo.
On the on-premises credentials page, in the Domain\user name box,
type Onprem\Administrator
pp.
In the Password box, type Pa$$w0rd and then click next.
qq.
On the Office 365 credentials page, in the User ID box, type your
tenant administrator account name.
rr.
In the Password box, type your tenant administrator password and
then click next.
ss.
On the Set up Exchange Hybrid page, click update.
While the hybrid configuration
process is running, the wizard displays the feature and service areas that are
being configured for the hybrid deployment as they are updated.
tt.
On the Done page, click close.
If you receive any errors,
review the reported error details. Click back to move back through the
hybrid deployment wizard and correct any items that may be wrong.
If you receive a message that
Office 365 was unable to communicate with your on-premises Autodiscover
endpoint, click close, and then on the setup tab, click modify.
Run the wizard again using the settings from the previous steps, and verify
that no warnings or errors were reported.
64. Configure OAuth authentication between Exchange and Exchange Online
organizations.
For
mixed Exchange 2013/2010 and Exchange 2013/2007 hybrid deployments, the new
hybrid deployment OAuth-based authentication connection between Office 365 and
on-premises Exchange organizations is not configured by the Hybrid
Configuration wizard. These deployments continue to use the federation trust
process by default. However, certain Exchange 2013 features are only fully
available across your organization by using the new Exchange OAuth
authentication protocol. These features include:
·
Message Rights Management (MRM)
·
Exchange In-place eDiscovery
·
Exchange In-place Archiving
The scripts in this exercise were created using the
information in the TechNet article Configure OAuth authentication between
Exchange and Exchange Online organizations located at https://technet.microsoft.com/en-us/library/dn594521(v=exchg.150).aspx.
a.
On MBX2, open File Explorer and browse to C:\LabFiles.
b.
Double-click CreateAuthAndEnableApp.ps1 to open the script in
Notepad.
c.
In the script file, review the two configurations that will be
completed. This script will create an authorization server object, and enable
the partner application for you Exchange Online organization.
In Notepad, locate and replace
the five X’s with your lab number. For example, replace LabXXXXX with Lab01234.
d.
Close Notepad and then, in the Notepad dialog box, click Save.
e.
Switch to the Exchange Management Shell.
f.
In the Exchange Management Shell, type the following and then press
Enter:
CD C:\LabFiles
g.
In the Exchange Management Shell, type the following and then press
Enter:
.\CreateAuthAndEnableApp.ps1
h.
Switch to File Explorer and locate the ExportAuthCert.ps1 and UploadAuthCert.ps1
script files. These scripts will export the on-premises
authorization certificate and then import the certificate to your Exchange
Online organization. Open each script and review the content. When complete,
close Notepad.
i.
Switch to the Exchange Management Shell.
j.
In the Exchange Management Shell, type the following and then press
Enter:
.\ExportAuthCert.ps1
k.
In the Exchange Management Shell, type the following and then press
Enter:
.\UploadAuthCert.ps1
l.
In the Enter Credentials window, type you tenant administrator name and
password, and then click OK.
The Windows Azure®
Active Directory module for Windows PowerShell was already installed for you on
this virtual machine. The Connect-MsolServer command is being called by the
script that requires the module.
m.
Identify the external Exchange endpoints for your on-premises
organization. In the Exchange Management Shell, type the following and then
press Enter:
Get-WebServicesVirtualDirectory | FL Server,
AdminDisplayVersion,ExternalUrl
Review the output of the
command. The EWS external URL for MBX2 will be used.
n.
Switch to File Explorer.
o.
Double-click RegisterEndpoints.ps1
p.
In Notepad, locate the $externalAuthority variable. This
represents the endpoint or endpoints that will be registered with your Exchange
Online organization. For this lab, a wildcard with the external domain name
will be used in the external authority variable rather than the specific EWS
external host name.
In Notepad, locate and replace
the five X’s with your lab number. For example, replace LabXXXXX with Lab01234.
q.
Close Notepad and then, in the Notepad dialog box, click Save.
r.
Switch to the Exchange Management Shell.
s.
In the Exchange Management Shell, type the following and then press
Enter:
.\RegisterEndpoints.ps1
There is no output for this
command.
t.
Switch to File Explorer.
u.
Double-click CreateIntraOrgConnectors.ps1.
v.
This script will create the intraorganization connectors for your
on-premises target addresses to Office 365 and for the Office 365 target
addresses to your on-premises organization.
In Notepad, locate the text YourTenantDomainName.onmicrosoft.com.
Change YourTenantDomainName to your Office 365 tenant name. For example,
change YourTenantDomainName.onmicrosoft.com to Contoso.onmicrosoft.com.
w.
In Notepad, locate and replace the five X’s with your lab number. For
example, replace LabXXXXX with Lab01234.
x.
Close Notepad and then, in the Notepad dialog box, click Save.
y.
Switch to the Exchange Management Shell.
z.
In the Exchange Management Shell, type the following and then press
Enter:
.\ CreateIntraOrgConnectors.ps1
aa.
In the Enter Credentials window, type you tenant administrator user name
and password, and then click OK.
Wait for the command to
complete.
bb.
In the Exchange Management Shell, type the following and then press
Enter. Replace the five X’s with your lab number and replace yourtenantdomainname
with your Office 365 domain name.
Add-AvailabilityAddressSpace -AccessMethod
InternalProxy -ProxyUrl https://hybrid.LabXXXXX.O365Ready.com/ews/exchange.asmx
-ForestName yourtenantdomainname -UseServiceAccount $True
For example: Add-AvailabilityAddressSpace
-AccessMethod InternalProxy -ProxyUrl
https://hybrid.Lab00123.O365Ready.com/ews/exchange.asmx -ForestName contoso.onmicrosoft.com
-UseServiceAccount $True
65. Verify
that the OAuth configuration is correctly configured.
a.
On MBX2, in the Exchange Management Shell, type the following and then
press Enter:
Test-OAuthConnectivity -Service EWS -TargetUri
https://outlook.office365.com/ews/exchange.asmx -Mailbox PeterH -Verbose | FL
PeterH is the name of an
on-premises mailbox user. Review the output of the command and verify that the
ResultType reads Success.
b.
On the taskbar, click Windows PowerShell.
c.
At the Windows PowerShell command prompt, type the following and then
press Enter:
$UserCredential = Get-Credential
d.
In the Enter Credentials window, type you tenant administrator name and
password, and then click OK.
e.
At the Windows PowerShell command prompt, type the following and then
press Enter:
$Session = New-PSSession -ConfigurationName
Microsoft.Exchange -ConnectionUri
https://outlook.office365.com/powershell-liveid/ -Credential $UserCredential
-Authentication Basic -AllowRedirection
f.
At the Windows PowerShell command prompt, type the following and then
press Enter:
Import-PSSession $Session
g.
At the Windows PowerShell command prompt, type the following and then
press Enter. Replace the five X’s with your lab number.
Test-OAuthConnectivity -Service EWS -TargetUri https://hybrid.LabXXXXX.O365Ready.com/ews/exchange.asmx -Mailbox NormanE -Verbose | fl
NormanE is the name of a cloud
user mailbox. Review the output of the command and verify that the ResultType
reads Success.
h.
Close Windows PowerShell.
66. Verify
the new hybrid configuration.
a.
On MBX2, switch to the Exchange Management Shell.
b.
In the Exchange Management Shell, type the following and then press
Enter:
Get-HybridConfiguration
Review the information in the
command output. Notice the features that are part of the hybrid configuration.
c.
Switch to File Explorer.
d.
In File Explorer, browse to C:\Program Files\Microsoft\Exchange
Server\V15\Logging\Update-HybridConfiguration.
e.
In the Update-HybridConfiguration folder, double-click the HybridConfiguration_current_date_time.log
file.
f.
In Notepad, review the hybrid wizard configuration log.
g.
Close Notepad.
h.
Close File Explorer.
i.
In the Exchange Management Shell, type the following and then press
Enter:
IISReset
For the lab environment, web services
are being reset to ensure connectivity in the next exercise.
Exercise 3: Understanding the Federated Client
Experience
In this exercise, you will migrate an on-premises user’s
mailbox to Exchange Online using the migration wizard. You will also create a
mailbox in Exchange Online, test Outlook Web App connectivity and Free/Busy
lookups. Finally, you will share a calendar with an on-premises user and enable
an Exchange Online user’s archive mailbox.
Virtual Machines
The following virtual machines will be used during this
exercise:
· MBX2
· CL1
Tasks
67. Run
Directory Synchronization.
a.
Switch to SRV1 and Windows PowerShell.
b.
At the Windows PowerShell command prompt, type the following and then
press Enter:
.\DirectorySyncClientCmd.exe delta
c.
Wait for the command to complete and then review the output for the
command.
Directory synchronization is
being performed again to ensure that all user account information is fully
updated.
68. Verify
that RMS Proxy is enabled.
a.
Switch to MBX2 and the Exchange admin center.
b.
In the top navigation menu, click Enterprise.
c.
In the feature pane, click servers.
If you receive a warning that
the trial period for MBX1 has expired, click ok. This will not cause
failures in the lab.
d.
Click the virtual directories tab.
e.
Click the Select server menu and then click MBX2.Onprem.local.
f.
In the virtual directories list, double-click EWS (Default Web
Site).
g.
On the general tab, verify that the Enable MRS Proxy endpoint
check box is selected, and then click cancel. If the checkbox is not
selected, select it and then click save.
69. Create
a migration batch.
a.
In the Exchange admin center, in the feature pane, click recipients.
b.
In the results pane, in the mailboxes list, click Bob Kelly.
c.
In the details pane, scroll down, and under Move Mailbox, click To
Exchange Online.
d.
In the New Migration Batch window, on the Enter on-premises account
credentials page, in the Account with privileges box, type Onprem\Administrator
e.
In the Password of account with privileges box, type Pa$$w0rd
and then click next.
f.
On the Confirm the migration endpoint page, in the The FQDN of the
Exchange server that the Mailbox Replication Service (MRS) Proxy is on box,
type hybrid.LabXXXXX.O365Ready.com where XXXXX is your lab
number, and then click next.
If the connection to the server
cannot be completed, close Internet Explorer, and then in the Exchange
Management Shell, run IISReset. When complete, sign in to the Exchange Admin
Center again, and then retry the new migration batch.
g.
On the Move configuration page, in the New migration batch name
box, type Move Bob Online
h.
In the Target delivery domain menu, verify that yourtenantdomain.mail.onmicrosoft.com
is listed.
For example,
contoso.mail.onmicrosoft.com.
i.
Review the available settings for moving a mailbox, archive mailbox,
default item limit values, and then click next.
j.
On the Start the batch page, review the default settings and then click new.
By default, the new migration
batch will automatically start, but it will not automatically complete. This
allows the Administrator to complete the migration at a later time if
necessary.
k.
After the migration batch has been created, notice the information
dialog box that is displayed. In the information dialog box, click yes.
This will redirect you to the
Exchange admin center in Office 365 and the migration tab.
70. Complete the mailbox move.
a.
On MBX2, in the Exchange admin center, on the migration tab,
notice the new migration batch request that was created. On the toolbar,
periodically click the Refresh icon until the migration batch is listed
as Synced.
This may take 2-3 minutes.
b.
In the details pane, review the information and then click Complete
this migration batch.
c.
In the warning dialog box, click yes.
Prior to completing the move,
users will continue to connect to their pre-moved mailbox database. By
completing the migration batch, a final incremental synchronization is
performed between the on-premises mailbox and the cloud mailbox, and the user’s
mailbox attributes are updated in Active Directory.
d.
In the details pane, under Mailbox status, click View details.
In the Migration Batch Users
window, notice that the status of the migration batch is listed as either
Queued, Synced, or Completing. Click the Refresh icon to update the
view. Continue to refresh periodically until the status reads Completed.
This may take 3-5 minutes to complete.
e.
In the details pane, click download the report for this user.
f.
In the Internet Explorer notification, click Open.
g.
Review the report in Notepad. Notice that the report includes information
from the initial synchronization until the completion of the mailbox move.
Close Notepad.
h.
In the details pane, scroll down and click More Details.
i.
Review the progress times provided and then click close.
j.
On the migration tab, on the toolbar above the migration
batches list, click the Refresh icon to update the view and verify
that the status reads Completed.
k.
In the menu, click the Delete icon.
l.
In the warning dialog box, click yes.
m.
In the top navigation menu, click Enterprise.
n.
Above the mailboxes list, on the toolbar, click the Refresh
icon.
Notice that the mailbox type for
Bob Kelly is now shown as Office 365.
71. Create a remote mailbox.
a.
In the Exchange admin center, on the mailboxes tab, on the
toolbar, click the New menu.
b.
In the New menu, click Office 365 mailbox.
c.
In the Office 365 Mailbox window, in the First name box, type Eric.
d.
In the Last name box, type Gilmore.
e.
In the User logon name box, type EricG
f.
Click the menu containing the UPN suffix and then click your lab domain
name.
g.
In the New password and Confirm password boxes, type Pa$$w0rd
and then click save.
h.
Switch to Server Manager.
i.
On the menu, click Tools and then click Active Directory Users
and Computers.
j.
In the console tree, expand Onprem.local and then click Users.
k.
In the results pane, click Eric Gilmore and then move the user
account into the Accounts organizational unit.
l.
In the Active Directory Domain Services dialog box, click Yes.
m.
Close Active Directory Users and Computers.
72. Run
Directory Synchronization.
a.
Switch to SRV1 and Windows PowerShell.
b.
At the Windows PowerShell command prompt, type the following and then
press Enter:
.\DirectorySyncClientCmd.exe delta
c.
Wait for the command to complete and then review the output for the
command.
73. Assign
a licenses to Office 365 accounts.
a.
Switch to MBX2 and Internet Explorer.
b.
In Internet Explorer, press Ctrl+T to create a new tab in Internet
Explorer, and then browse to http://portal.office.com
If necessary, on the Office 365
page, sign in using your tenant administrator user name and password.
c.
In the top navigation menu, click Home.
d.
In the feature pane, expand USERS, and then click Active Users.
e.
In the active users list, select the Bob Kelly, Eric
Gilmore, Holly Holt, and John Woods check boxes.
f.
In the details pane, click Activate synced users.
g.
On the assign licenses page, under Set user location, click the Select
a location menu and then click United States.
h.
Under assign licenses, verify that Microsoft Office 365 Plan
E3 check box is selected, scroll down, and then click Activate.
i.
On the results page, click Finish.
74. Test
Outlook Web App redirect.
a.
Switch to SRV1 and Windows PowerShell.
b.
At the Windows PowerShell command prompt, type the following and then
press Enter:
.\DirectorySyncClientCmd.exe delta
Wait for the command to complete.
c.
Switch to MBX2, and switch to the Exchange Management Shell.
d.
In the Exchange Management Shell, type the following and then press
Enter:
Get-OrganizationRelationship | FL Target*
Review the output of the command
and notice the values that have been set. These target redirection values were
configured by the hybrid configuration wizard.
e.
Switch to CL1.
f.
Click the lock screen.
g.
Click Other user.
h.
In the User name box, type BobK
i.
In the Password box, type Pa$$w0rd and then press Enter.
j.
On the desktop, on the taskbar, click Internet Explorer.
k.
In the Address bar, type https://hybrid.LabXXXXX.O365Ready.com/OWA
where XXXXX is your lab number, and then press Enter.
l.
On the Outlook Web App page, in the User name box, type BobK@yourlabdomainname.
m.
In the Password box, type Pa$$w0rd and then press Enter.
Notice the URL that is presented
to Bob for connection to his Outlook Web App mailbox.
n.
Click the URL to redirect to the OWA page.
o.
On the Office 365 page, in the Sign in with your organizational
account box, type BobK@yourlabdomainname
p.
In the Password box, type Pa$$w0rd
q.
Select the Keep me signed in check box and then click Sign in.
r.
On the Outlook Web App page, click the Time zone menu, click (UTC-08:00)
Pacific Time (US & Canada), and then click save.
75. Verify
Free/Busy information between Office 365 and Exchange on-premises.
a.
On CL1, in Outlook Web App, click the app launcher, and then
click Calendar.
b.
Click New.
c.
In the Event box, type Daily meeting.
d.
In the Location box, type My office.
e.
Click the Start date menu and then click the following Tuesday in
the calendar.
f.
Click the Start time menu and then click 9:00 AM.
g.
Click the Repeat menu and then click Every Tuesday.
h.
Click SAVE.
i.
Switch to MBX1.
j.
Open Internet Explorer and then browse to https://hybrid.LabXXXXX.O365Ready.com/OWA
where XXXXX is your lab number.
k.
Sign in to Outlook Web App page, HollyH@yourlabdomainname with a
password of Pa$$w0rd
l.
On the Outlook Web Access page, click OK.
m.
In folder pane, click Calendar.
n.
Click New.
o.
Click the Scheduling Assistant tab.
p.
Under Select Attendees, in the Add a name box, type Bob
Kelly and then press Enter.
q.
Click the Start menu and then click a Tuesday in the
following week.
r.
Click the time menu, and then click 9:00 AM.
Notice the free/busy information
for Bob Kelly.
s.
Close the Untitled Meeting window.
t.
In the Windows Internet Explorer dialog box, click Leave this
page.
76. Share
a cloud-based mailbox user’s calendar.
a.
Switch to CL1.
b.
In Outlook Web App signed in as Bob Kelly, in the upper right corner
below the calendar view options, click SHARE.
c.
In the Share with box, type Holly Holt and then press
Enter.
d.
Next to Holly Holt, click the Full details menu.
e.
Review the available options, and then click SEND.
f.
Close Internet Explorer.
g.
Switch to MBX1 and Outlook Web Access.
h.
In the folder pane, click Mail.
i.
In the message list, click the email from Bob Kelly.
You may have to wait for the
email to arrive. Click Check Messages to update the message list.
j.
In the reading pane, review the content of the sharing invitation. In
the sharing invitation, click the outlook.office365.com link to view the
calendar in a new browser tab.
k.
In the Redirecting message, click OK.
l.
Review the calendar.
The shared calendar may not be
available immediately. If you receive a 403 Forbidden page, close the tab, wait
for one to two minutes, and then try again. If the page is still unavailable,
continue with the lab.
m.
Close Internet Explorer and all tabs.
77. Enable
a cloud-based archive mailbox.
a.
Switch to MBX2 and Internet Explorer.
b.
In Internet Explorer, click the tab for the Exchange admin center.
c.
In the recipients feature, on the mailboxes tab, click Bob
Kelly.
d.
In the details pane, under In-Place Archive, click Enable.
e.
In the warning dialog box, click yes.
f.
Switch to SRV1 and Windows PowerShell.
g.
At the Windows PowerShell command prompt, type the following and then
press Enter:
.\DirectorySyncClientCmd.exe delta
Wait for the command to
complete.
h.
Switch to MBX2 and the Exchange admin center.
i.
On the mailboxes list, click Bob Kelly.
j.
In the details pane, under In-Place Archive, click View
details.
k.
In the Archive Mailbox window, in the Status box, notice that the
status is listed as Cloud-based archive pending. Click cancel.
l.
Switch to SRV1 and Windows PowerShell.
m.
At the Windows PowerShell command prompt, type the following and then
press Enter:
.\DirectorySyncClientCmd.exe delta
Wait for the command to
complete.
n.
Switch to MBX2 and the Exchange admin center.
o.
On the top navigation menu, click Office 365.
p.
On the dashboard page, under recipients, click mailboxes.
Or, if you are already in the recipients feature, click the mailboxes
tab.
q.
On the toolbar, click Refresh.
r.
In the mailboxes list, click Bob Kelly.
s.
In the details pane, under In-Place Archive, click View
details.
t.
In the warning dialog box, click ok.
u.
In the Status box, verify that Local archive created is
shown, and then click cancel.
v.
In the Exchange admin center, in the top navigation menu, click Enterprise.
w.
Switch to CL1 signed on as Bob Kelly.
x.
Click Start, and then, on the Start screen, type Outlook.
y.
In the results list, click Outlook 2013.
z.
On the Welcome to Outlook 2013 page, click Next.
aa.
On the Add an Email Account page, click Next.
bb.
On the Auto Account Setup page, click Next.
cc.
In the Windows Security window, verify that BobK@yourlabdomainname
is shown.
dd.
In the Password box, type Pa$$w0rd, select the Remember
my credentials check box, and then click OK.
ee.
On the Configuring page, click Finish.
ff.
In the First things first window, click No thanks, and then click
Accept.
gg.
In the folder pane, click the Expand the Folder Pane icon.
hh.
On the taskbar, right-click Outlook 2013 and then click Pin
this program to taskbar.
ii.
In the folder pane, notice the archive mailbox.
You may have to wait a minute
until the archive mailbox appears and is accessible.
78. (Optional) Sign in to
Outlook Web App using a non-domain joined computer.
a.
On your local computer, open Internet Explorer.
This is not a computer in the
virtual machine environment.
b.
In the address bar, type http://outlook.Office365.com and then
press Enter.
c.
On the Office 365 page, in the Sign in with your
organizational account box, type BobK@LabXXXXX.O365Ready.com where XXXXX is your lab number.
d.
In the Password box, type Pa$$w0rd
and then click Sign in.
e.
Notice that the experience is the same as an on-premises user. Close
Internet Explorer.
Exercise 4: Sharing On-Premises Public Folders
with Cloud Mailbox Users
In this exercise, you will share the on-premises public
folders with user mailboxes that are located in Exchange Online.
Virtual Machines
The following virtual machines will be used during this
exercise:
· MBX1
· MBX2
· CL1
Tasks
79. Create
a new mailbox for public folder proxy connections.
a.
Switch to MBX1 and open the Exchange Management Shell.
b.
In the Exchange Management Shell, type the following and then press
Enter:
New-MailboxDatabase -StorageGroup "MBX1\First
Storage Group" -Name "PFProxyMDB"
c.
In the Exchange Management Shell, type the following and then press
Enter:
Mount-Database PFProxyMDB
There is no output for this
command.
80. Create a proxy mailbox for public folders.
Create
a proxy mailbox within the new mailbox database and hide the mailbox from the
address book. The SMTP of this mailbox will be returned by AutoDiscover as the
DefaultPublicFolderMailbox SMTP. By resolving this SMTP the client can reach
the legacy exchange server for public folder access.
a.
On MBX1, in the Exchange Management Shell, type the following and then
press Enter. Replace the five X’s with your lab number.
New-Mailbox -Name PFMailbox -Database PFProxyMDB
-UserPrincipalName PFMailbox@LabXXXXX.O365Ready.com -OrganizationalUnit Accounts
b.
At the Password prompt, type Pa$$w0rd and then press
Enter.
c.
In the Exchange Management Shell, type the following and then press
Enter:
Set-Mailbox -Identity PFMailbox -HiddenFromAddressListsEnabled
$true
There is no output for this
command.
81. Configure
synchronization for mail-enabled public folders.
a.
On MBX1, in the Exchange Management Shell, type the following and then
press Enter:
CD C:\LabFiles\PFScripts
b.
In the Exchange Management Shell, type the following and then press
Enter:
.\Export-MailPublicFoldersForMigration.ps1
MailPFs.xml
c.
On the taskbar, click Windows PowerShell.
d.
At the Windows PowerShell command prompt, type the following and then
press Enter:
CD C:\LabFiles\PFScripts
e.
At the Windows PowerShell command prompt, type the following and then
press Enter:
$Cred = Get-Credential
f.
In the Windows PowerShell Credential Request window, in the User name
box, type your Office 365 tenant administrator user name.
g.
In the Password box, type your tenant administrator password and
then click OK.
h.
At the Windows PowerShell command prompt, type the following and then
press Enter:
$Session = New-PSSession -ConfigurationName
Microsoft.Exchange -ConnectionUri https://ps.outlook.com/powershell/
-Credential $Cred -Authentication Basic -AllowRedirection
i.
At the Windows PowerShell command prompt, type the following and then
press Enter:
Import-PSSession $Session
j.
At the Windows PowerShell command prompt, type the following and then
press Enter:
.\Import-MailPublicFoldersForMigration.ps1
MailPFs.xml
Synchronization for mail-enabled
public folders only occurs at the point in time when the scripts are executed.
It is recommended to run these commands on a schedule to ensure mail-enabled
public folders continue to be synchronized as new mail-enabled public folders
are created or removed.
82. Force
directory synchronization.
a.
Switch to SRV1 and Windows PowerShell.
b.
At the Windows PowerShell command prompt, type the following and then
press Enter:
.\DirectorySyncClientCmd.exe delta
Wait for the command to complete
and then review the output for the command.
c.
Switch to MBX2 and the Exchange admin center.
d.
In the top navigation menu, click Office 365.
e.
In the recipients feature, click the contacts tab.
Verify that the PFMailbox
mailbox is in the mailboxes list.
You may need to click Refresh
on the toolbar to update the recipients list. If the mailbox is not listed,
wait for 1 to 2 minutes and refresh the list. If the mailbox is still not
listed, you may need to force directory synchronization again.
f.
Close Internet Explorer and all tabs.
g.
Close the Exchange Management Shell.
83. Enable
Remote Public Folders in Exchange Online.
a.
Switch to MBX1 and Windows PowerShell with the remote session to
Exchange Online.
b.
At the Windows PowerShell command prompt, type the following and then
press Enter:
Set-OrganizationConfig -PublicFoldersEnabled
Remote -RemotePublicFolderMailboxes PFMailbox
c.
At the Windows PowerShell command prompt, type the following and then
press Enter.
Get-OrganizationConfig | FL *Public*
Review the output of the command
and verify the configured settings.
d.
At the Windows PowerShell command prompt, type the following and then
press Enter.
Get-PSSession | Remove-PSSession
e.
Close Windows PowerShell.
f.
Close the Exchange Management Shell.
84. Force
directory synchronization.
a.
Switch to SRV1 and Windows PowerShell.
b.
At the Windows PowerShell command prompt, type the following and then
press Enter:
.\DirectorySyncClientCmd.exe delta
Wait for the command to complete
and then review the output for the command.
c.
For lab purposes, run the delta synchronization again to ensure all
attributes have been synchronized. At the Windows PowerShell command prompt,
type the following and then press Enter:
.\DirectorySyncClientCmd.exe delta
Wait for the command to
complete.
85. Review
the Public Folders in Outlook signed in as an on-premises user.
a.
Switch to CL1 signed in as Bob Kelly.
b.
Close Outlook.
c.
Click Start.
d.
On the Start screen, click Bob Kelly and then click Switch
account.
e.
Sign in as HollyH with a password of Pa$$w0rd
f.
Click Start, and then on the Start screen, type Outlook
g.
Click Outlook 2013.
h.
On the Welcome to Outlook 2013 page, click Next.
i.
On the Add an Email Account page, click Next.
j.
On the Auto Account Setup page, click Next.
k.
On the Configuring page, click Finish.
l.
In the First things first window, click No thanks, and then click
Accept.
m.
On the taskbar, right-click Outlook 2013, and then click Pin
this program to taskbar.
n.
In Outlook, in the folder pane, click the Expand the Folder Pane icon.
icon.
o.
In the bottom navigation bar, next to Tasks, click the ellipsis, and
then click Folders.
p.
In the folder pane, expand Public Folders, expand All Public
Folders, and then expand Europe.
The Public Folders were created
by the ConfigEnv.ps1 script that was run in the setup lab.
q.
Click Leases and then, in the ribbon bar, click New Post.
r.
In the Untitled window, in the Subject box, type Test Post
and then click Post.
86. Review
the Public Folders as a cloud mailbox user.
a.
On CL1 signed in as Holly Holt, click Start.
b.
On the Start screen, click Holly Holt, and then click ONPREM\BobK.
c.
On the sign in screen, in the Password box, type Pa$$w0rd
and press Enter.
d.
On the Start screen, click Desktop.
e.
On the taskbar, click Outlook 2013.
f.
In the bottom navigation bar, next to Tasks, click the ellipsis, and
then click Folders.
If the Public Folders are not visible,
you may have to wait until Outlook retrieves the Public Folders. This may take
several minutes or more. You may need to continue to the next exercise and then
review the Public Folders later.
g.
On the desktop, in the system tray, press Ctrl, right-click the Outlook
icon, and then click Test E-mail AutoConfiguration.
h.
In the Test E-mail AutoConfiguration window, clear the Use Guessmart
and Secur Guessmart Authentication, and then click Test.
i.
Click the XML tab.
j.
Scroll down to the bottom of the results and locate the
<PublicFolderInformation> tag and review the information.
If the
<PublicFolderInformation> tag is not listed, Public Folders have not been
updated yet. Close the Test E-mail AutoConfiguration window and close Outlook.
k.
Close the Test E-mail AutoConfiguration window.
l.
In the folder pane, expand Public Folders, expand All Public
Folders, and then expand Europe.
m.
In the Public Folders list, click Leases.
Notice that Bob Kelly, a cloud
mailbox user, is able to interact with the on-premises Public Folder mailboxes.
n.
Close Outlook.
o.
On the desktop, click Start, on the Start screen, click Bob
Kelly, and then click Sign out.
In this exercise, you will install and configure an Active
Directory Federation Services (AD FS) server and an AD FS Proxy server. You
will then convert your lab domain in Office 365 from managed to federated, and
then test single sign-on.
Virtual Machines
The following virtual machines will be used during this
exercise:
· DC1
· SRV1
· SRV2
· TMG1
· CL1
Tasks
87. Create
a DNS Host Record for Active Directory Federation Services.
a.
Switch to DC1 signed in as Onprem\Administrator.
b.
In the Server Manager window,
click Tools, and then click DNS.
c.
In the console tree, expand Forward
Lookup Zones, and then click your lab domain name DNS zone.
d.
Right-click your lab domain name
DNS zone and then click New Host (A or AAAA).
e.
In the New Host window, in the Name
box, type fs
This
host will be used for Active Directory Federation Services.
f.
In the IP address
box, type 192.168.0.200 and then click Add Host.
This
is the IP address of SRV1 where AD FS will be installed.
g.
In the DNS dialog box,
click OK.
h.
In the New Host window, click Done.
i.
Close DNS Manager.
88. Install
the AD FS service role.
a.
Switch to SRV1 signed in as Onprem\Administrator.
b.
On the taskbar, click Server Manager.
c.
In Server Manager, on the Dashboard page, under Configure this local
server, click Add roles and features.
d.
In the Add Roles and Features Wizard window, click Next.
e.
On the Select installation type page, verify that the Role-based or
feature-based installation check box is selected, and then click Next.
f.
On the Select destination server page, verify that SRV1.Onprem.local
is selected in the Server Pool list, and then click Next.
g.
On the Select server roles page, in the Roles list, select the Active
Directory Federation Services check box.
h.
In the Add Roles and Features Wizard dialog box, review the
additional features that will be installed, and then click Add Features.
i.
On the Select server roles page, click Next.
j.
On the Select features page, click Next.
k.
On the Active Directory Federation Services (AD FS) page, review the
information, and then click Next.
l.
On the Select role services page, click Next.
m.
On the Web Server Role (IIS) page, click Next.
n.
On the Select role services page, click Next.
o.
On the Confirm installation selections page, click Install.
p.
On the Installation progress page, wait for the installation to
complete. When complete, review the information, and then click Close.
89. Import
a certificate from a trusted third party Certificate Authority.
a.
On SRV1, open File Explorer and then browse to C:\LabFiles.
b.
Double-click Labcert.pfx.
c.
In the Certificate Import Wizard window, under Store Location,
click Local Machine, and then click Next.
d.
On the File to Import page, click Next.
The Certificate Import Wizard
window may have moved behind the other windows.
e.
On the Private key protection page, in the Password box, type Pa$$w0rd
and then click Next.
f.
On the Certificate Store page, click Next.
g.
On the Completing the Certificate Import Wizard, click Finish.
h.
In the Certificate Import Wizard dialog box, click OK.
i.
Close File Explorer.
90. Assign
a public certificate to the default web site on SRV1.
a.
On SRV1, in Server Manager, click Tools and then click Internet
Information Services (IIS) Manager.
b.
In the Internet Information Services (IIS) Manager window, in the
connections pane, expand SRV1 (ONPREM\Administrator).
c.
In the Internet Information Services (IIS) Manager dialog box,
click No.
d.
Expand Sites, and then click Default Web Site.
e.
In the actions pane, click Bindings.
f.
In the Site Bindings window, click Add.
g.
In the Add Site Binding window, click the Type menu and then
click https.
h.
Click the SSL certificate menu and then click Lab Certificate.
i.
In the Add Site Binding window, click OK.
j.
In the Site Bindings window, click Close.
k.
Close the IIS Manager.
91. Create
and configure a service account for AD FS.
a.
Switch to DC1 signed in as ONPREM\Administrator.
b.
In Server Manager, on the menu, click Tools and then click Active
Directory Users and Computers.
c.
In the console tree, expand Onprem.local and then click Users.
d.
Right-click Users, point to New, and then click User.
e.
In the First name box, type ADFS
f.
In the Last name box, type Svc
g.
In the User logon name, type ADFSsvc
h.
In the User logon name, click the menu, click your lab domain name, and
then click Next.
i.
In the Password and Confirm password boxes, type Pa$$w0rd
j.
Clear the User must change password at next logon check box.
k.
Select the Password never expires check box and then click Next.
l.
On the finish page, click Finish.
m.
Close Active Directory Users and Computers.
n.
On the toolbar, click Windows PowerShell.
o.
At the Windows PowerShell command prompt, type the following and then
press Enter. Replace the five X’s with your lab number.
setspn -a host/fs.LabXXXXX.O365Ready.com ADFSsvc
Review the output of the
command.
p.
Close Windows PowerShell.
92. Configure
AD FS.
a.
Switch to SRV1.
b.
In Server Manager, click Tools, and then click AD FS
Management.
c.
In the AD FS console, in the results pane, click AD FS Federation
Server Configuration Wizard.
d.
On the Welcome page, verify that Create a new Federation Service
is selected and then click Next.
e.
On the Select a Stand-alone or Farm Deployment page, verify that New
federation server farm is selected and then click Next.
f.
On the Specify the Federation Service Name page, verify that the
Federation Service name is fs.LabXXXXX.O365Ready.com, where XXXXX is
your lab number, and then click Next.
g.
On the Specify a Service Account page, click Browse.
h.
In the Select User window, in the Enter the object name to select box,
type ADFSsvc, click Check Names, and then click OK.
i.
In the Password box, type Pa$$w0rd and then click Next.
j.
On the Ready to Apply Settings page, review the configuration and then
click Next.
Wait for the configuration to
complete.
k.
On the Configuration Results page, review the results and click Close.
l.
Close the AD FS console.
For the purpose of this lab, a
second AD FS server member will not be installed. When adding additional
servers, you would select Add a federation server to an existing Federation
Service in the configuration wizard.
93. Import
a certificate from a trusted third-party Certificate Authority.
a.
Switch to SRV2 signed in as Admin.
b.
On the taskbar, click File Explorer.
c.
In File Explorer, browse to C:\LabFiles.
d.
Double-click Labcert.pfx.
e.
In the Certificate Import Wizard window, under Store Location,
click Local Machine, and then click Next.
f.
On the File to Import page, click Next.
The Certificate Import Wizard
window may have moved behind the other windows.
g.
On the Private key protection page, in the Password box, type Pa$$w0rd
and then click Next.
h.
On the Certificate Store page, click Next.
i.
On the Completing the Certificate Import Wizard, click Finish.
j.
In the Certificate Import Wizard dialog box, click OK.
k.
Close File Explorer.
94. Install
the AD FS Proxy service role.
a.
On SRV2, switch to Server Manager.
b.
In Server Manager, on the Dashboard page, under Configure this local
server, click Add roles and features.
c.
In the Add Roles and Features Wizard window, click Next.
d.
On the Select installation type page, verify that Role-based or
feature-based installation is selected, and then click Next.
e.
On the Select destination server page, verify that SRV2 is
selected in the Server Pool list, and then click Next.
f.
On the Select server roles page, in the Roles list, select the Active
Directory Federation Services check box.
g.
In the Add Roles and Features Wizard dialog box, review the
additional features that will be installed, and then click Add Features.
h.
On the Select server roles page, click Next.
i.
On the Select features page, click Next.
j.
On the Active Directory Federation Services (AD FS) page, review the
information, and then click Next.
k.
On the Select role services page, clear the Federation Service
check box, select the Federation Service Proxy check box, and then click
Next.
l.
On the Web Server Role (IIS) page, click Next.
m.
On the Select role services page, click Next.
n.
On the Confirm installation selections page, click Install.
o.
On the Installation progress page, wait for the installation to
complete. When complete, review the information, and then click Close.
95. Assign
a public certificate to the default web site on SRV2.
a.
On SRV2, in Server Manager, click the Tools menu and then click Internet
Information Services (IIS) Manager.
b.
In the Internet Information Services (IIS) Manager window, in the
connections pane, expand SRV2 (SRV2\Admin).
c.
In the Internet Information Services (IIS) Manager dialog box,
click No.
d.
Expand Sites, and then click Default Web Site.
e.
In the actions pane, click Bindings.
f.
In the Site Bindings window, click Add.
g.
In the Add Site Binding window, click the Type menu and then
click https.
h.
Click the SSL certificate menu and then click Lab Certificate.
i.
In the Add Site Binding window, click OK.
j.
In the Site Bindings window, click Close.
k.
Close the IIS Manager.
96. Configure
the AD FS Proxy on SRV2.
a.
On SRV2, in Server Manager, click Tools and then click AD FS
Federation Server Proxy Configuration Wizard.
b.
On the Welcome to the AD FS Federation Server Proxy Configuration Wizard
page, click Next.
c.
On the Specify Federation Service Name page, in the Federation
Service name box, verify that fs.LabXXXXX.O365Ready.com where XXXXX
is your lab number is shown.
d.
Click Test Connection.
e.
In the AD FS Federation Server Proxy Configuration Wizard dialog
box, verify that the contact was successful, and then click OK.
f.
On the Specify Federation Service Name page, click Next.
g.
In the Windows Security dialog box, in the User name box,
type Onprem\Administrator
h.
In the Password box, type Pa$$w0rd and then click OK.
i.
On the Ready to Apply Settings page, click Next.
j.
On the Configuration Results page, wait for the configuration to
complete, review the configuration status, and then click Close.
In the lab environment, the AD
FS proxy server is on the same IP network as the Active Directory network. In a
production environment, you would locate the AD FS proxy server in the
perimeter network.
97. Test
the firewall policy on TMG1 for AD FS.
a.
Switch to TMG1 and open the Forefront TMG Management console.
b.
In the Firewall Policy list, right-click the AD FS rule,
and then click Properties.
c.
In the AD FS Properties window, click Test Rule.
d.
In the Web Publishing Rule Test Results window, verify that the test is successful
and then click Close.
e.
In the AD FS Properties window, click OK.
98. Convert
your managed domain to federated using Windows PowerShell.
a.
Switch to DC1.
b.
Minimize Server Manager and any other open windows.
c.
On the desktop, double-click the Windows Azure AD Module for Windows
PowerShell shortcut.
The Windows Azure AD Module for
Windows PowerShell was installed in an earlier lab.
d.
At the Windows PowerShell command prompt, type the following and then
press Enter:
Connect-MsolService
e.
In the Enter Credentials window, type your tenant administrator user
name and password and then click OK.
f.
At the Windows PowerShell command prompt, type the following and then
press Enter:
Get-MsolDomain
Verify that your lab domain’s
authentication is set to Managed.
g.
At the Windows PowerShell command prompt, type the following and then
press Enter:
Set-MsolAdfsContext
-Computer SRV1.Onprem.local
h.
Convert your managed domain to federated. At the Windows PowerShell
command prompt, type the following and then press Enter. Replace the five X’s
below with your lab number.
Convert-MsolDomainToFederated
-DomainName LabXXXXX.O365Ready.com
i.
At the Windows PowerShell command prompt, type the following and then
press Enter:
Get-MsolDomain
Review the output of the command and notice that
authentication is now set to Federated
for your lab domain name.
99. Test
single sign-on.
a.
Switch to CL1.
b.
Click the lock screen.
c.
Click Other user.
d.
In the User name box, type BobK
e.
In the Password box, type Pa$$w0rd and then press Enter.
f.
On the desktop, on the taskbar, click Internet Explorer.
g.
In Internet Explorer, in the upper right corner, click the Tools
icon and then click Internet options.
h.
In the Internet Options window, click the Security tab.
i.
In the Select a zone to view or change security settings section,
click Local intranet and the click Sites.
j.
In the Local intranet window, click Advanced.
k.
In the Add this website to the zone box, type *.LabXXXXX.O365Ready.com
where XXXXX is your lab number, click Add, and then click Close.
l.
In the Local intranet window, click OK.
m.
In the Internet Properties window, click OK.
n.
In Internet Explorer, browse to http://portal.office.com
Bob Kelly will automatically be
signed in. In an earlier exercise, the Keep my signed in check box was
selected.
If Bob Kelly is not
automatically signed in, on the Office 365 page, click BobK@LabXXXXX.O365Ready.com
where XXXXX is your lab number.
o.
In the top navigation menu, click Bob Kelly or the user icon, and
then click Sign out.
p.
On the Office 365 page, click BobK@yourlabdomainname.
In the address bar, notice that
you are being redirected to the Active Directory Federation Services URL for
authentication. This may happen too fast to see the URL redirection used to
authenticate Bob Kelly.
q.
Close Internet Explorer.


